
Want to finally paint over that dark, dated wood stain? It's a project we tackle all the time, and the secret isn't in the final coat of paint—it’s all in the prep work. Get the prep right, and you're guaranteed a finish that looks professional and lasts for years.
The Foundation for Painting Over Stained Wood
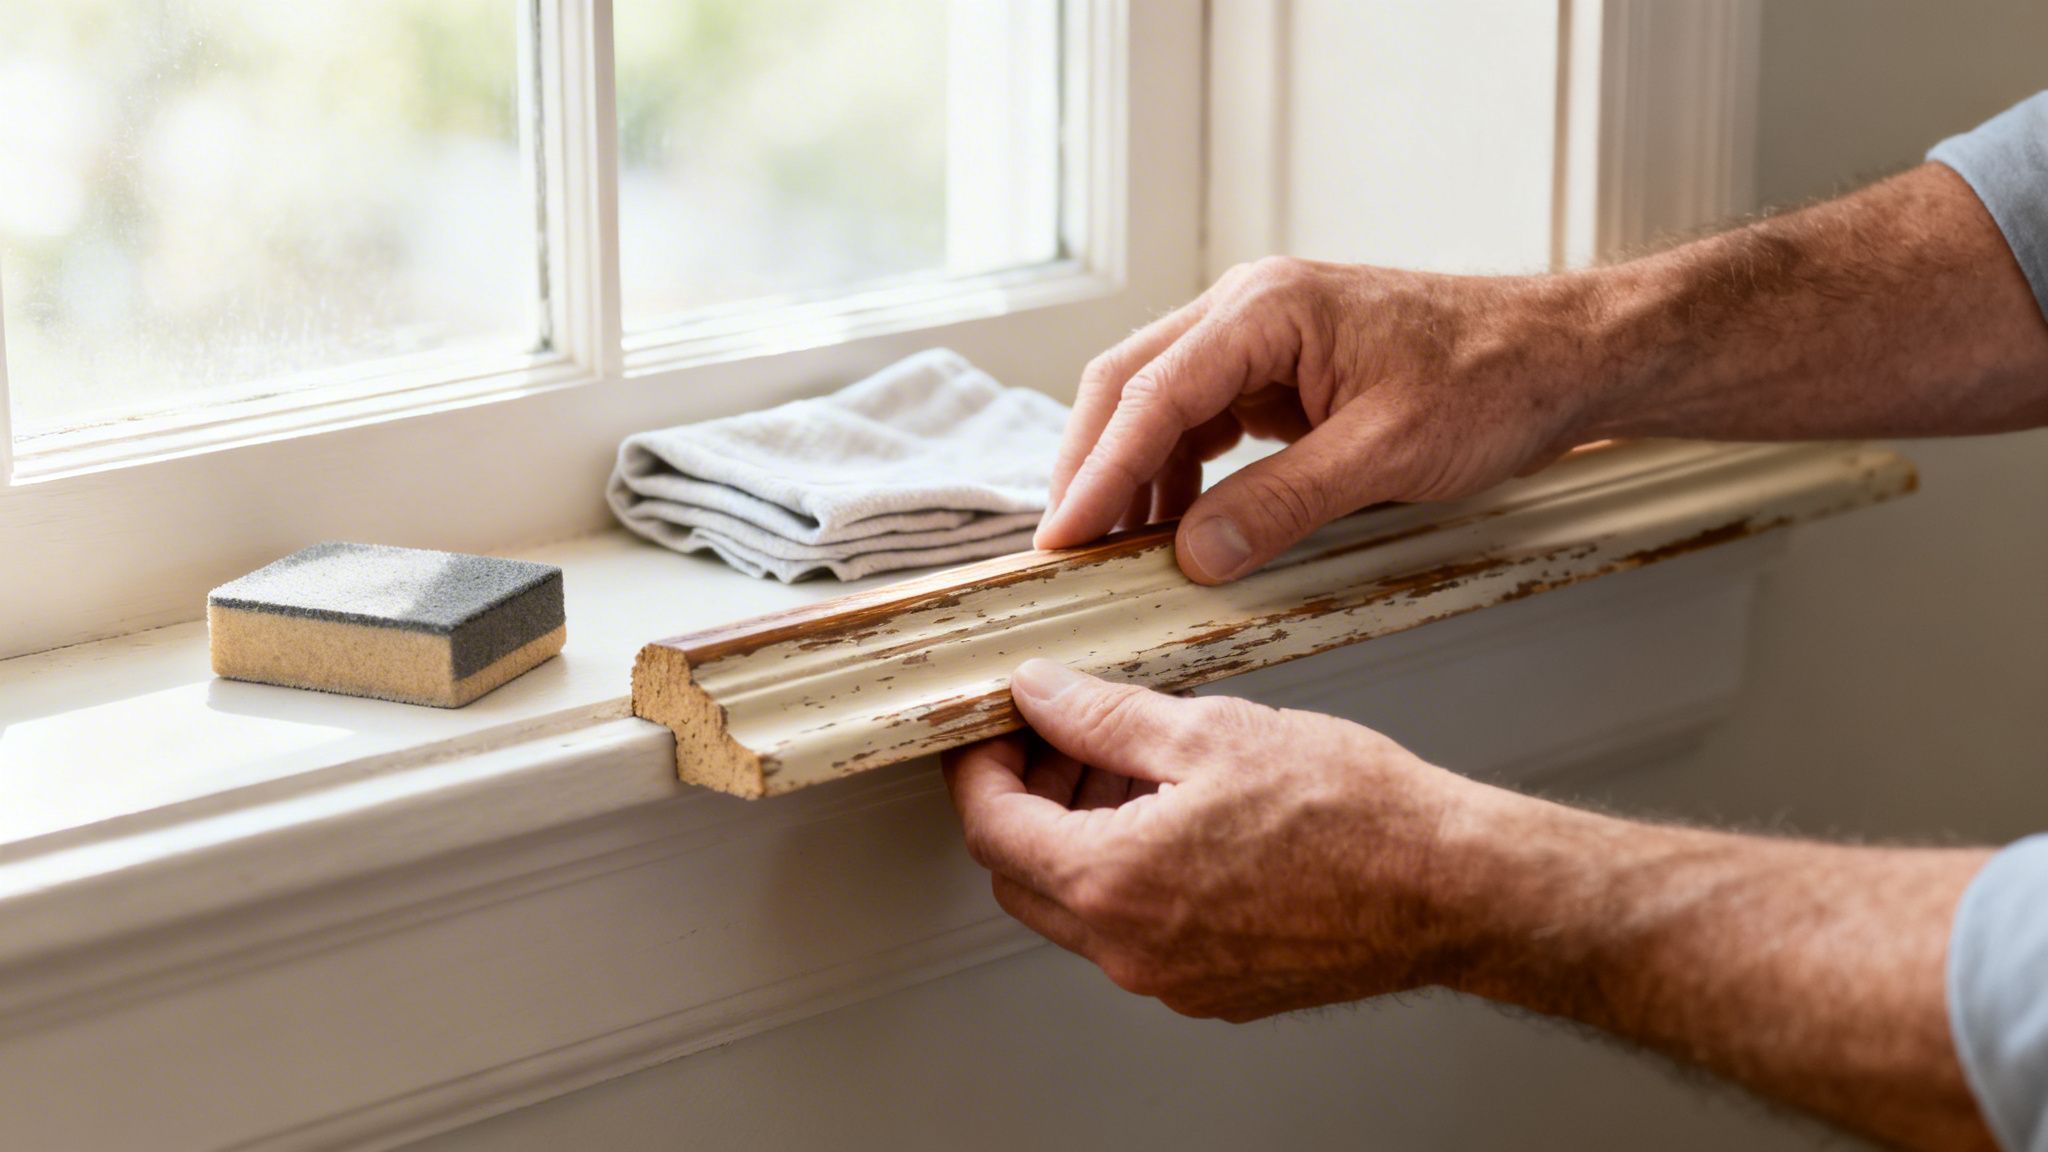
If your home has trim, cabinets, or paneling from the 70s or 80s, you know the look. That dark, almost glossy stain can make a room feel heavy and dated. We see it constantly in homes across Connecticut and New York, and homeowners are often hesitant to paint over it, worried the paint will just peel right off.
And you know what? They're right to be worried. It will peel if you skip the prep. This guide walks you through the same process our professional crews use, from the initial assessment to the final coat, so you can get it right the first time.
Why You Absolutely Cannot Skip Prep Work
A lot of homes in Fairfield County built during the housing booms of the 1970s and 1980s have dark, oil-based stains that are famously stubborn. Paint just can’t stick to that slick, non-porous surface without serious help. The entire U.S. wood stain market was valued at US$ 2.3 billion in 2023, which tells you just how much of this stuff is out there.
This is where professional prep techniques become non-negotiable. Our crews thoroughly sand surfaces to remove 90-95% of that old, slick layer. It’s a game-changer, pushing paint adhesion success rates to over 98%. This single step is the best way to avoid the peeling that plagues 15-20% of DIY jobs, a common issue reported by the Connecticut Department of Consumer Protection. If you want to dive deeper, you can explore more data on the wood stain industry to see why tackling old finishes is so critical.
The most important thing to remember is this: a lasting paint job is built on a foundation of proper cleaning, sanding, and priming. Cut corners here, and you're setting yourself up for failure.
A Quick Look at the Process
Before you even think about picking a paint color, you need to map out your project. Here’s a quick rundown of what a successful job looks like:
Before you even touch a sander or a paintbrush, a quick but thorough look at your wood surface is essential. This initial check will tell you what you're up against and guide your preparation strategy. Use this table as a quick reference.
Initial Wood Stain Assessment Checklist
| Assessment Point | What to Look For | Why It Matters |
|---|---|---|
| Stain Type | Rub a cotton ball with denatured alcohol on a small spot. If stain comes off, it’s likely water-based. If not, it’s oil-based. | Oil-based stains are slicker and require more aggressive sanding and a specific type of stain-blocking primer. |
| Surface Condition | Dents, deep scratches, peeling varnish, or water damage. | These imperfections need to be filled and sanded smooth before priming, or they will show through the final paint coat. |
| Existing Finish | Is it a simple stain, or is there a glossy topcoat like polyurethane or varnish? | A glossy topcoat creates a non-porous barrier. It must be de-glossed or sanded off for the primer to adhere properly. |
| Wood Type | Is it a knotty wood like pine, or a tannin-rich wood like oak or cedar? | Woods like pine and oak are known for "bleeding" tannins or resin through paint, which requires a shellac-based or oil-based stain-blocking primer. |
Taking a few minutes for this assessment saves you hours of frustration later. Knowing whether you have an oil-based stain on oak, for example, immediately tells you that a high-adhesion, stain-blocking primer is a must-have, not a nice-to-have.
Here's the path forward:
- Surface Assessment: First, figure out what you’re dealing with. Is the stain oil-based or water-based? What condition is the wood in?
- Thorough Preparation: This is where the real work happens. You’ll need to clean off years of grime and then sand the surface to give the primer something to bite into.
- Primer Selection: Don’t just grab any primer. You need a specialized stain-blocking primer designed to stop old pigments and wood tannins from bleeding through your new paint.
- Paint Application: Finally, the fun part. Apply multiple thin, even coats of high-quality paint for that perfectly smooth finish you’re after.
Every stage here is crucial. Our team has perfected this system on countless projects, and you can see the results in our work, like in this recent cabinet transformation. By following these same guidelines, you can confidently learn how to paint over wood stain and achieve a beautiful, durable result.
The Prep Work: Where a Great Paint Job Is Made or Broken
Let's be direct: this is the stage where your project either succeeds or fails. A beautiful, durable paint finish is built entirely on the foundation of what you do before you even open a can of paint.
Skipping or rushing these steps is the single biggest mistake we see, and it almost always leads to peeling, chipping, and ugly bleed-through that ruins all your hard work.
We’re going to move beyond a simple wipe-down and walk you through the professional process for preparing stained wood. It comes down to three key phases: a deep clean, strategic sanding, and tackling the details. Get this right, and you’re setting yourself up for a finish that will last for years.
Cut Through Years of Grime with a Deep Clean
Think about all the invisible grime that builds up over the years. Cooking grease in the kitchen, oils from hands on a banister, or decades of furniture polish on a built-in—all of it creates a barrier that paint simply can't stick to. Your first job is to get rid of every last trace.
For this, your average household cleaner won't do the trick. You need something heavy-duty. We always recommend a TSP substitute (Trisodium Phosphate substitute). These are powerful detergents designed to cut right through stubborn grease and oils without the harshness of traditional TSP.
Mix the solution based on the package directions, grab a sponge or a non-abrasive scrub pad, and start scrubbing in sections. Make sure to give extra attention to high-touch areas. Once you're done, rinse the surface completely with a clean cloth and fresh water. This is critical—any leftover cleaning residue can cause paint adhesion to fail. Let the wood dry completely.
Pro Tip: Always wear gloves to protect your hands when using a strong cleaner. And change your rinse water often so you’re not just wiping dirty water back onto the surface.
The Critical Role of Sanding for Adhesion
With the wood clean and bone-dry, it's time to sand. The point of sanding isn’t to strip the old stain off completely. Your main goals are to degloss the surface and create a "tooth" for the primer to grab onto.
It’s like trying to write on a glossy photograph with a pencil—the graphite just slides right off. Paint acts the same way on a slick, finished surface. By scuffing up that gloss, you create microscopic peaks and valleys that give the primer something to physically bond to. For most projects like trim, doors, or furniture, a light scuff sand is perfect.
- Choose the Right Grit: Stick with 120 to 150-grit sandpaper. It's coarse enough to dull the finish without leaving deep, ugly scratches that will show through your paint.
- Hand Sanding vs. Power Sanding: An orbital sander is a huge time-saver for big, flat areas like tabletops or door panels. But for detailed trim or contoured cabinet doors, you'll get better results by hand-sanding with a sanding sponge or a folded sheet of sandpaper.
- Know When You're Done: Your goal is a surface that looks uniformly dull and matte. Once you get there, wipe away every speck of sanding dust with a tack cloth or a clean rag lightly dampened with denatured alcohol.
This level of prep is standard practice for us. On tougher jobs, our process often means sanding with 120-220 grit paper to expose up to 80% of the bare wood, followed by a TSP-substitute cleaning that removes over 99% of contaminants.
This detailed approach has become even more important as the industry moves toward water-based topcoats, which now make up 55% of the market. These newer paints are fantastic, but they demand a perfectly prepped surface—a fact driven by low-VOC regulations mandated by agencies like the Connecticut Department of Consumer Protection since 2018. Following these prep steps dramatically cuts down on failure rates, which is why understanding trends in the wood coatings market is so key to a successful project.
Handling Intricate and Hard-to-Sand Areas
So, what do you do about those ornate furniture legs or intricately carved cabinet details where sanding is almost impossible? This is where a liquid deglosser (sometimes called liquid sandpaper) is your best friend.
A liquid deglosser is a solvent-based product that chemically etches the surface. It softens the old finish and creates a dull, paint-ready surface without all the dust.
- Pour some of the liquid deglosser onto a clean, lint-free cloth.
- Wipe it firmly over the surface, working in small, manageable sections.
- The old finish will feel a bit tacky as the solvent does its job.
- Pay close attention to the instructions—most deglossers require you to apply your primer within a specific window of time.
While a liquid deglosser is a fantastic problem-solver, sanding is always our preferred method for flat, accessible surfaces. It provides a stronger, more reliable mechanical bond. We often use a combination of both: sanding the easy-to-reach areas and then using a deglosser for the fine details.
By using the right methods, you can transform even the most challenging stained wood into a perfect canvas, just like in our professional cabinet painting projects. With your surface now clean, dull, and dust-free, you are officially ready for the most important product decision you'll make: choosing the right primer.
Choosing The Right Primer to Guarantee a Perfect Finish
Think of primer as the most important decision you'll make in this entire project. After all that work cleaning and sanding, grabbing the wrong primer—or worse, skipping it altogether—is the #1 reason paint jobs fail over stained wood. It's the critical handshake between the old surface and your new paint.
The main job of a good primer here isn't just to help the paint stick. It’s to build a bulletproof barrier that stops old stain pigments and wood tannins from bleeding through your new paint color. This is especially true for the dark, oil-based stains we see all the time in Connecticut and New York homes built before the 2000s.
Without the right primer, those old colors will eventually creep through, leaving you with ugly yellow or pinkish blotches weeks or even months down the road.
This flowchart lays out the non-negotiable prep work that has to happen before a drop of primer ever touches the wood.
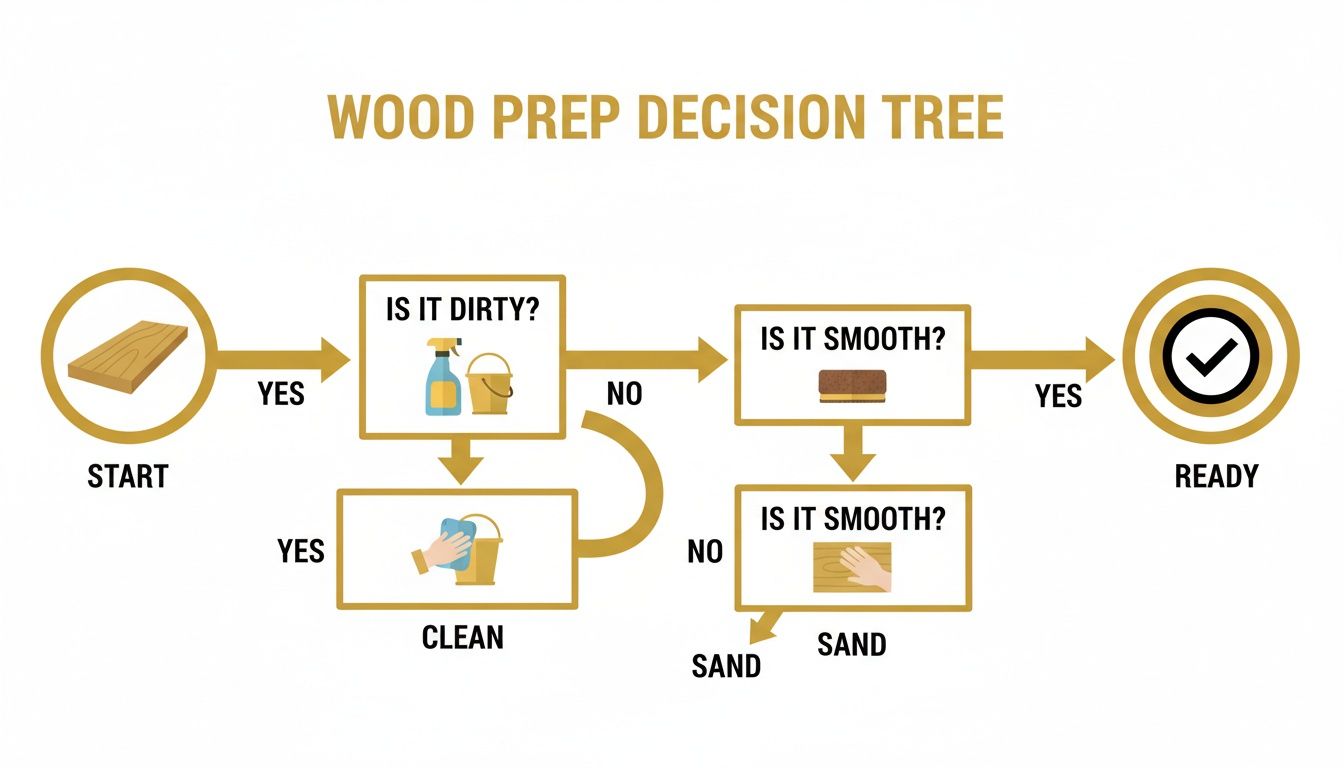
There are no shortcuts here. You have to clean the surface, then sand it properly. Only then do you have a surface that’s truly ready for primer to do its job effectively.
The Heavy Hitters: Oil-Based And Shellac Primers
When you’re up against stubborn stains, you need to bring in the big guns. This is where oil-based and shellac-based primers prove their worth. They might not be the easiest to work with, but for tough jobs, they are the undisputed champions.
Oil-Based Primers: These are the reliable workhorses for blocking common stains from old wood finishes, water marks, and even ink. They create a tough, durable film that gives your topcoat a fantastic surface to grab onto. Yes, they have a strong smell and require mineral spirits for cleanup, but their effectiveness is legendary for a reason.
Shellac-Based Primers: Shellac is the ultimate problem-solver. It’s our top pick for the most challenging bleed-through situations. If you’re painting over knotty pine, cedar, or redwood, a shellac primer is absolutely essential. It's the only thing that can permanently lock in the resins from wood knots that would otherwise bleed through every other product.
We recently tackled a kitchen in Stamford, CT, with original pine cabinets from the 80s. The homeowner had tried painting them twice, but the knots kept bleeding through within a year. We applied two coats of a shellac-based primer just on the knots, then one full coat over everything. The finish is still flawless.
Shellac primers are also incredible at blocking stubborn odors from smoke or nicotine that get trapped in old finishes. They dry lightning-fast but have a very strong, alcohol-based odor, so make sure you have plenty of ventilation.
The Modern Go-To: High-Adhesion Acrylic Primers
While oil and shellac are powerhouses, paint technology has come a long way, giving us some great water-based options. High-adhesion acrylic (or latex) primers are fantastic for many projects, especially when you need low odor and easy cleanup.
These primers are made specifically to stick to slick, glossy, and hard-to-paint surfaces. They’re a solid choice for stained wood that is not a heavy bleeder. If your stain is water-based or you’re painting a wood that doesn’t have a lot of tannins (like maple or birch), a high-adhesion acrylic primer is a more user-friendly and highly effective choice.
But a word of caution from the field: while many acrylic primers claim to have "stain-blocking" power, they almost always lose the fight against heavy bleeding from oak tannins or pine knots. In those cases, it’s always safer to go with an oil or shellac product. The humid summers here in Connecticut and New York can also slow down paint cure times, making bleed-through even more of a risk and a powerful primer even more critical.
Primer Selection Guide for Painting Over Wood Stain
Choosing the right primer can feel like a lot, so we've put together this quick guide. Use this table to match your project’s needs with the best product for the job.
| Primer Type | Best For Blocking | Pros | Cons & Cleanup |
|---|---|---|---|
| Oil-Based | General wood stains, water stains, ink, and crayon marks. | Excellent adhesion, very durable, creates a smooth base for paint. | Strong odor, requires mineral spirits for cleanup, longer dry times. |
| Shellac-Based | Wood knots (pine/cedar), heavy tannins (oak/redwood), severe smoke, and nicotine odors. | Fastest drying, unparalleled stain and odor blocking, sticks to almost anything. | Very strong alcohol smell, requires denatured alcohol for cleanup, brittle finish. |
| Acrylic (Latex) | Light stains, previously painted surfaces, non-bleeding woods. | Low odor, easy soap-and-water cleanup, flexible and fast-drying. | Less effective on heavy stains, may not block severe wood tannins or knots. |
Ultimately, the right primer depends entirely on the challenges your specific wood surface presents. By taking a moment to identify the wood and the type of stain you're dealing with, you can choose a primer that guarantees your new paint job will look amazing for years to come.
Applying Paint for a Smooth, Professional Finish
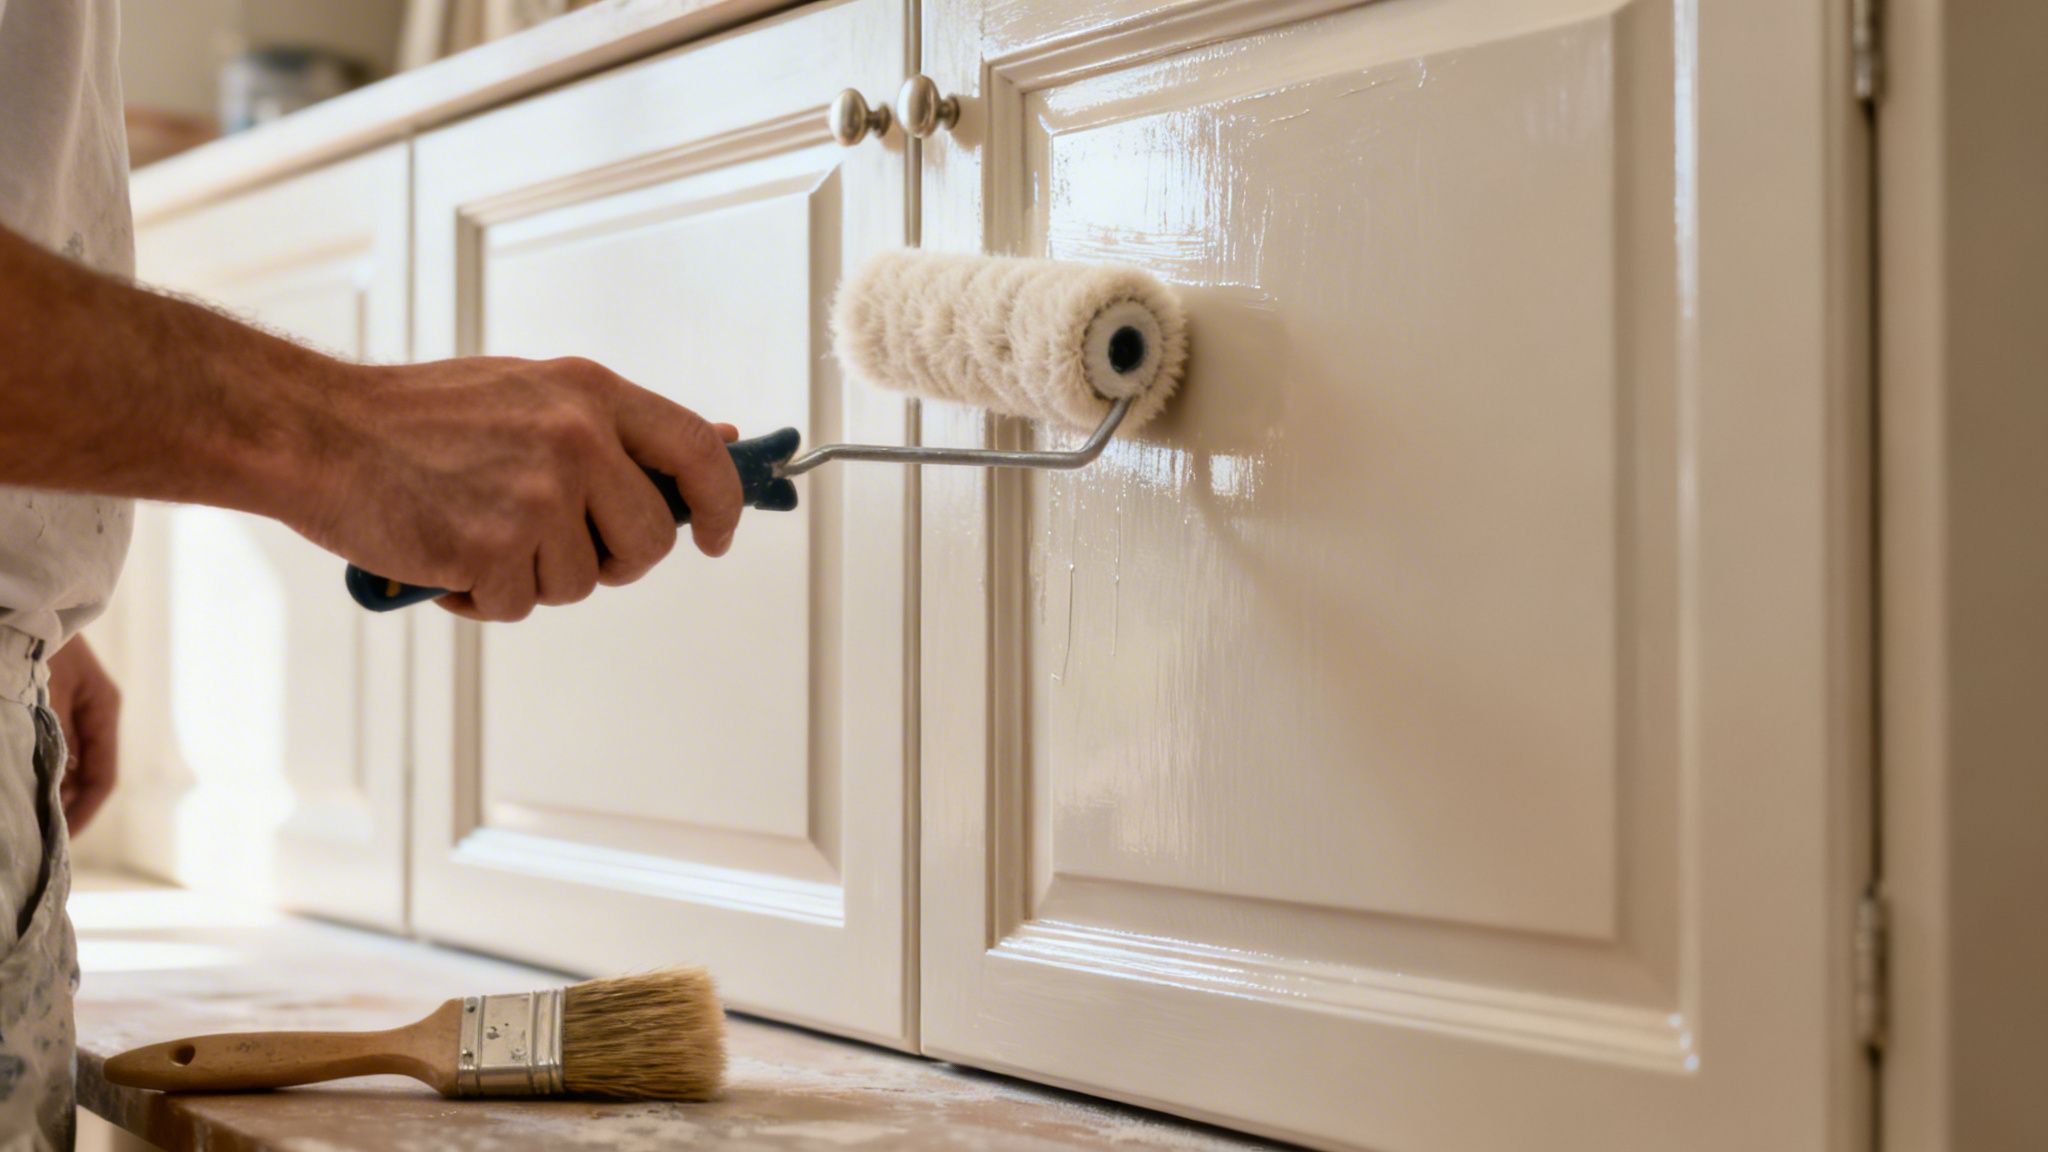
Alright, the surface is prepped and primed. This is the moment where all that painstaking prep work really starts to shine, letting you create that flawless, factory-like finish you’re after. It all comes down to picking the right tools and using the right techniques to lay down the paint perfectly.
How you apply the paint is what separates a DIY-looking job from one that looks like it came straight from a high-end workshop. You've got three main choices: a brush, a roller, or a paint sprayer. Each tool has its purpose, and knowing which one to grab is half the battle.
Choosing Your Application Tools
The quality of your tools will make or break your finish. A cheap brush or the wrong roller nap will leave you with a streaky, uneven mess, no matter how much you spent on the paint.
Brushes: For cutting in around edges, getting into tight corners, and painting detailed trim, you absolutely need a high-quality brush. With modern acrylic and latex paints, a nylon/polyester blend brush is the industry standard. It holds paint well, keeps a sharp edge for clean lines, and is stiff enough to spread paint without leaving a trail of brush marks.
Rollers: When you’re painting flat, wide areas like cabinet doors, drawer fronts, or paneling, a mini-roller is your best friend. It’s much faster than a brush and helps you achieve a beautifully uniform surface.
- For Ultra-Smooth Surfaces: Grab a mohair or high-density foam mini-roller. These are designed to leave almost no texture, which is exactly what you want for a sleek, modern cabinet finish.
- For General Surfaces: A 3/8-inch nap microfiber roller is a fantastic all-around option for doors and larger trim pieces. It strikes a great balance between smooth application and good paint pickup.
We almost always use a combination of tools to get the best results. A brush gets into the detailed profiles of a cabinet door, and we immediately follow it with a small mohair roller on the flat panels to even everything out. This hybrid approach gives you both precision and a seamless look.
Techniques for a Flawless Finish
Applying paint isn't just about slapping it on the surface; it's a craft. The goal is to build up thin, even coats that create a durable and beautiful finish.
One of the most important professional techniques is called "tipping off." After you brush on a section of paint, you gently sweep the very tip of your brush across the wet paint in one long, continuous stroke. This simple move magically smooths out any brush marks and levels the paint. Always work from a wet edge into a dry area to prevent ugly lap marks.
Remember the golden rule of painting: two thin coats are always better than one thick coat. A thick coat might feel like a shortcut, but it’s a recipe for drips, runs, and that bumpy "orange peel" texture. Even worse, thick paint takes forever to cure properly, leaving it soft and easy to damage for weeks.
For that buttery-smooth feel, you have to sand between coats. Once your first coat of paint is completely dry (check the can for recoat times), give the entire surface a light scuff-sand with 220-grit sandpaper. This knocks down any tiny imperfections or dust nibs, giving you a perfect base for your final coat. Just be sure to wipe away all the dust with a tack cloth before you start painting again.
Using a Paint Sprayer for a Factory Finish
For the ultimate smooth finish, especially on a big project like a full kitchen of cabinets, nothing can touch a paint sprayer. On our high-end jobs in Fairfield County, we rely on HVLP (High Volume, Low Pressure) sprayers. These tools atomize the paint into a fine mist, laying down a perfectly even coat that’s impossible to get with a brush or roller.
Spraying definitely requires more setup—you have to mask off everything you don't want painted—but the results are undeniably professional. It's the best choice for projects with lots of intricate details or when you're after a truly flawless, modern look. You can see the quality of this finish in our recent residential painting projects.
Finally, have patience. After that final coat, the paint needs to cure, not just dry. It might be "dry to the touch" in a few hours, but a full cure—when the paint reaches maximum hardness—can take several weeks. This is especially true in the humid climate we get here in Connecticut. Avoid any heavy use or harsh cleaning during this curing period to make sure all your hard work lasts.
Troubleshooting Common Painting Problems
Even when you follow every prep step perfectly, painting over old wood stain can throw you a curveball. Don't panic. In our years of experience, we've seen it all, and most issues are surprisingly straightforward to fix once you know what you're dealing with.
This is where a pro's know-how really makes a difference. Let's walk through the common hiccups we see on job sites and how to get your project back on track for a beautiful, lasting finish.
The Most Common Issue: Stain Bleed-Through
You’ve primed, you’ve applied that first beautiful coat of paint, and everything looks great. But then you come back a few hours later and see it: ugly yellow or pinkish blotches bleeding through the new paint. This is stain bleed-through, and it’s the number-one headache when painting over old, dark stains or woods rich in tannins, like oak.
It happens because the solvents in your new paint can actually reactivate the pigments in the old stain or the natural tannins within the wood itself. These then migrate right up through the primer and paint. It's frustrating, but the fix is direct.
The biggest mistake we see is trying to cover it with another coat of paint. It will not work. You have to stop the bleed at its source with a more powerful, targeted primer.
You don't need to strip the whole piece and start over. Just spot-prime the areas that are bleeding.
- Lightly scuff the affected spots with 220-grit sandpaper just enough to dull the sheen.
- Wipe away every bit of dust with a clean, dry cloth.
- Apply a coat of shellac-based primer directly over the stains. Shellac is our go-to for locking down the most stubborn bleed-through; it's practically bulletproof.
- Once that spot-primer is dry, you can repaint those sections. The stain is now permanently sealed away.
Fixing Paint Peeling or Chipping
If your new paint job starts to chip or peel away easily, the problem is almost always poor adhesion. This means the primer never formed a strong bond with the original stained surface, creating a weak link for the entire finish.
This issue almost always traces back to the prep work. Either the surface wasn't cleaned thoroughly enough to get rid of grease and grime, or the sanding step wasn't aggressive enough to scuff up the old glossy finish. Sometimes, using the wrong type of primer is the culprit.
To fix peeling paint, you have to get back to a solid foundation.
- Use a putty knife or a 5-in-1 tool to gently scrape off all the loose, peeling paint.
- Feather the edges of the remaining paint by sanding them smooth so the repair will be invisible.
- Get back to basics: thoroughly clean the exposed area and scuff-sand the original surface.
- Apply the correct stain-blocking primer (an oil-based or shellac primer will create a solid bond).
- Once the new primer is dry, you can repaint the area to blend in with the rest of your project.
Understanding Dry Time vs. Cure Time
This is a critical concept we stress to all our clients, especially with the shifting humidity we see across Connecticut and New York. Knowing the difference between "dry" and "cured" can save your new finish from being ruined.
- Dry to the Touch: This usually happens within a few hours. The surface won't feel tacky, but the paint film underneath is still very soft and can be easily dented or scratched.
- Full Cure: This is when the paint reaches its maximum hardness and durability. For most acrylic paints, this process can take anywhere from 21 to 30 days.
During this month-long curing window, you need to be gentle. Avoid any aggressive scrubbing or harsh cleaners. If you've painted a tabletop, don't put heavy objects on it just yet. For kitchen cabinets in a busy NYC apartment, we tell clients to get in the habit of using the pulls and hardware—not their fingernails—to open doors for the first few weeks. A little patience now ensures your hard work looks great for years to come.
Frequently Asked Questions About Painting Stained Wood
When you’re staring at that old stained wood trim and dreaming of a fresh coat of paint, a lot of questions come to mind. After years of working in homes across Connecticut and New York, our crews have heard just about all of them. Here are straight answers to the most common concerns we run into on the job, so you can move forward with confidence.
Do I Absolutely Have to Sand Before Painting Over Stain?
We get this one all the time. While it’s tempting to skip this step, we always recommend at least a light "scuff" sand. Think of it this way: sanding isn’t about removing the stain, it’s about creating a better surface for the paint to grab onto.
Sanding knocks down the old slick finish and creates a microscopic texture for the primer to grip. For high-traffic areas like kitchen cabinets or baseboards, skipping this is a direct path to peeling paint. In fact, poor surface prep is one of the leading causes of paint failure we see. For dark or old oil-based stains, a thorough sanding is completely non-negotiable.
Can I Use a Paint and Primer in One Product to Save Time?
We strongly advise against it for this kind of project. While those "paint and primer in one" products are great for going over an existing, similar paint color, they just don't have the chemical muscle needed for stained wood.
They lack the specific power to block the tannins that bleed from wood knots or the deep pigments found in old oil stains.
Sooner or later, those old colors will bleed through your new paint, leaving ugly, blotchy patches. You absolutely must use a dedicated, standalone stain-blocking primer—whether it's shellac, oil, or a high-adhesion acrylic—to guarantee a clean, professional, and long-lasting finish.
How Do I Know if the Old Stain Is Oil-Based or Water-Based?
Here’s a simple field test our crews use on every job. Find a hidden spot, like the inside of a cabinet door, and give it a firm rub with a cotton ball soaked in rubbing alcohol.
- If some of the color transfers to the cotton ball, the stain is likely water-based.
- If the cotton ball stays clean, you're almost certainly dealing with an oil-based stain.
Most of the stained trim, paneling, and cabinets we see in homes built before the 2000s, especially in older neighborhoods in Fairfield and Westchester County, are oil-based. Knowing this from the start confirms you'll need a very thorough cleaning and a powerful oil or shellac-based primer to get the best results.
When Should I Call a Professional Painter?
Consider calling a professional for any large-scale project, like an entire kitchen's worth of cabinets, or if you simply want a guaranteed, flawless finish without the time and hassle. A pro brings a level of expertise and equipment that’s tough to replicate on your own.
Professionals use tools like HVLP sprayers to achieve that factory-smooth look and have the experience to troubleshoot tricky stain issues on the fly. If your wood is in bad shape, needs major repairs, or if you're in an older home and suspect the presence of lead paint, calling an insured and certified company is always the safest, most effective choice.
Ready to transform your home with a flawless paint job but want to leave it to the experts? The team at CP Painting Company delivers stunning interior and exterior finishes that homeowners across Connecticut and New York trust. We handle the meticulous prep work and professional application so you can enjoy a beautiful, durable result without the stress. Contact us today for a free estimate!


