
Diving into wallpaper removal without a bit of detective work is a recipe for frustration. Before you grab a scraper and start peeling, taking a few minutes to assess your walls and the wallpaper itself is the most important thing you can do. This quick diagnosis sets the stage for the entire project—it dictates your removal method, the tools you'll need, and whether this is a quick afternoon task or a full-weekend battle.
Assess Your Walls and Wallpaper Before You Start
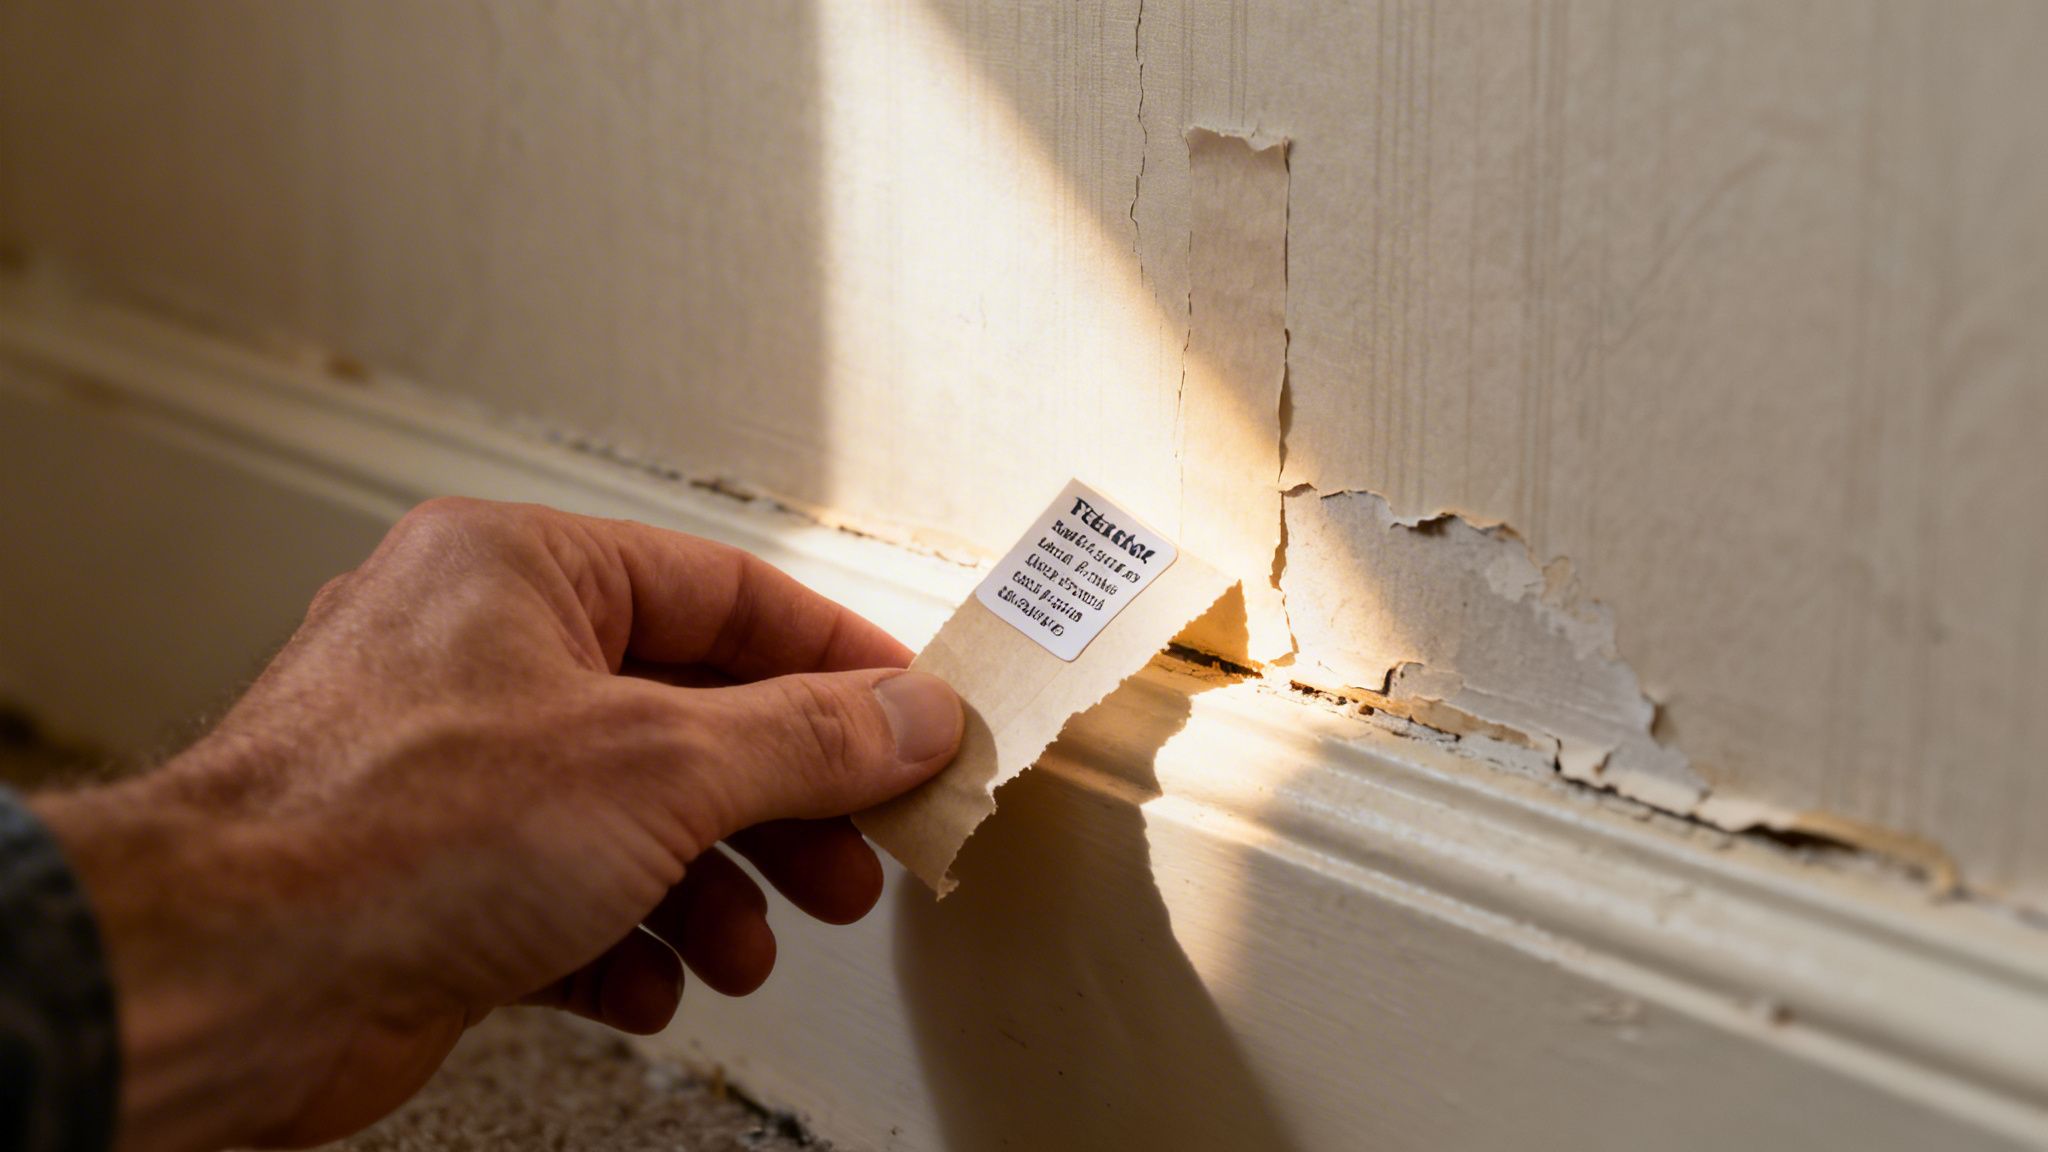
Before you tear into that dated floral pattern, pause and play detective. The clues you gather right now can save you from hours of tedious scraping and prevent costly drywall repairs down the road. It’s not a complicated process, but it’s essential for working smarter, not harder.
Your first mission is figuring out what kind of wallpaper you're up against. Different materials demand completely different removal strategies.
Identify Your Wallpaper Type
Find a hidden spot to start your investigation—behind a door, in a closet, or anywhere that won't be obvious. Use a putty knife or even just your fingernail to carefully lift a corner or a seam of the paper.
Strippable Wallpaper: Did the paper peel away easily in one large sheet without tearing? You've hit the jackpot. This is almost certainly a modern vinyl or non-woven "strippable" paper, made for easy removal. You might be able to dry-strip the whole room with minimal fuss.
Peelable Wallpaper: If the top decorative layer peels off but leaves a thin paper backing stuck to the wall, you have a "peelable" wallpaper. This is very common. That backing won't come off dry; it'll need a good soaking with water or steam.
Traditional Paper: Does the paper shred into tiny, maddening pieces as soon as you pull? You're likely dealing with an older, traditional paper. These were often hung with an incredibly strong, wheat-based paste and will absolutely require scoring, soaking, or steaming to loosen their grip.
Perform a Simple Water Test
After trying to peel a corner, it's time for a quick water test. Just mix a little hot water with a drop of dish soap in a spray bottle. Lightly spray a small, out-of-the-way section of the wallpaper.
Now, wait about 15 minutes. If the water soaked in and the paper now scrapes off easily, a simple soak-and-scrape method should work for the whole room. If the water just beads up and rolls off, you've got a non-porous wallpaper (like a vinyl or vinyl-coated paper). It will need to be scored with a special tool to create holes for the water to penetrate. This simple test gives you a perfect preview of the fight ahead.
Taking 15 minutes to test a small area is the single best investment you can make in a wallpaper removal project. It reveals the paper's secrets and helps you choose the right tools from the start, preventing you from gouging the wall out of sheer frustration.
This is exactly why the market for wallpaper removal tools is surprisingly huge. Just think about tackling a stubborn, multi-layered paper in an older Stamford, CT home—it's a headache plenty of homeowners know all too well. The global market for wallpaper removal devices was valued at $2,145.45 million in 2021 and is projected to climb to $4,153.81 million by 2033, driven by a constant wave of home renovations.
At CP Painting Company, we see this firsthand on jobs all across Fairfield and Westchester Counties. If you're curious, you can see some of the professional results we've achieved on local projects like this: https://cppaintingct.com/wp-content/uploads/2025/01/IMG_5057-1-768×158.jpeg.
Choosing the Right Wallpaper Removal Method
Not all wallpaper is created equal, and neither are the methods for getting it off your walls. Picking the right technique is probably the most important decision you'll make in this entire project. Get it right, and you're in for a satisfying afternoon of work. Get it wrong, and you could be looking at gouged drywall and days of pure frustration.
Think of it this way: you wouldn't use a sledgehammer to hang a picture frame. The same logic applies here. You don’t need a high-powered steamer for paper that’s practically falling off the wall on its own. Let’s walk through the main approaches so you can match the job to your specific situation.
The Easiest Path: Dry Stripping
Every now and then, the home improvement gods smile upon you. That's what it feels like when you discover your walls are covered with modern, strippable wallpaper. This is usually the case with newer vinyl or non-woven papers made for easy removal.
How do you know if you've hit the jackpot? Find an inconspicuous corner, maybe behind a door or a large piece of furniture, and try to peel it. If a big sheet comes away cleanly without tearing or leaving much behind, congratulations! You can likely "dry strip" the whole room. This is the dream scenario—no water, no chemicals, no steam. Just you, the wall, and some satisfying peeling.
But hold on. Sometimes only the top decorative layer comes off, leaving a thin paper backing. This is known as peelable wallpaper. While the vinyl front is gone, the paper left behind still needs to go. That’s when you’ll turn to one of the wet methods we’ll cover next.
The Classic Method: Scoring and Soaking
This is the old-school, tried-and-true DIY approach. It works wonders on many types of wallpaper, especially the paper backing left behind from a peelable top coat. The idea is simple: get moisture through the paper to dissolve the old glue holding it to the wall.
The trick is that most wallpapers have some level of water resistance. To get around this, you have to perforate the surface first. A wallpaper scoring tool is perfect for this—it creates thousands of tiny holes without damaging the drywall underneath.
Once the wall is scored, you soak it with a removal solution. You can go with a simple mix of hot water and a bit of dish soap in a spray bottle, or grab a commercial wallpaper remover concentrate. Apply it generously with a big sponge or a garden sprayer, working in sections you can manage. Let the solution sit for about 10-15 minutes. You’ll know it’s working when the paper starts to feel mushy and scrapes away easily with a wide putty knife.
Speaking of removal and renewal, this cycle is a huge driver in the home decor world. The global market for wallpaper removal was valued at $500 million in 2025 and is expected to hit $900 million by 2033. This growth mirrors the popularity of temporary options, as the removable wallpaper market is set to expand from $3.2 billion to $5.8 billion in the next decade. Here in CT, where CP Painting Company has become the go-to painter for hundreds of homeowners across Stamford and New Haven County, we’ve seen a 15% yearly increase in wallpaper removal jobs since 2015. You can dig deeper into these trends by exploring the latest industry analysis from Global Insight Services.
The Power of Steam: Using a Wallpaper Steamer
When you’re up against truly stubborn wallpaper—we’re talking multiple layers from the 70s, or paper that’s been painted over—a wallpaper steamer is your best friend. This tool uses hot steam to melt the old adhesive, making removal much faster and cleaner than soaking alone.
It works by holding a steam plate against a section of the wall for around 30 seconds. The hot, pressurized steam penetrates even the toughest papers and dissolves the paste. After a good steaming, the paper usually lifts away in big, satisfying sheets with just a little help from a scraper. It's especially effective on old plaster walls, which can be easily damaged by the aggressive scraping sometimes needed with the score-and-soak method.
Pro Tip: Steamers are powerful, but they introduce a lot of hot moisture into a room. Make sure you have good ventilation (open a window!), protect your floors with thick drop cloths, and be extremely careful around outlets and switches. Always shut off the power to the room at the breaker box first.
The Last Resort: Chemical Strippers
When you’ve tried everything else and the wallpaper still won't budge, it might be time to bring in the heavy artillery: a chemical stripper. These are gel or liquid-based formulas designed to dissolve the most stubborn glues known to man.
You typically apply them with a brush or roller, let them sit for the time specified on the label, and then scrape away the gooey mess of paper and paste. While they are incredibly effective, they should always be your last resort for a few key reasons:
- Safety First: These products contain strong chemicals. You absolutely need good ventilation, chemical-resistant gloves, and proper eye protection.
- Messy Application: Gels can be gloppy, messy to apply, and even messier to clean up.
- Wall Prep is Crucial: After using a chemical stripper, the wall must be thoroughly cleaned and neutralized. If you don't, your new primer and paint may fail to adhere properly.
If you go this route, follow the manufacturer’s instructions to the letter.
To make the choice easier, we've put together a quick comparison of these four methods. Take a look and see which one best fits the wallpaper you're dealing with.
Wallpaper Removal Method Comparison
| Method | Best For | Difficulty | Potential Risks | Pro Tip |
|---|---|---|---|---|
| Dry Stripping | Modern, strippable vinyl or non-woven papers. | Easy | Minimal. Risk of tearing drywall paper if you pull too aggressively. | Start at a seam or corner and pull down at a 45-degree angle. |
| Scoring & Soaking | Most older papers, especially after a vinyl top layer is removed. | Medium | Gouging the wall with the scraper; applying too much water. | Work in small, manageable sections to prevent the solution from drying out. |
| Steaming | Multiple layers, painted-over wallpaper, or very old, stubborn paper. | Medium | Burns from steam; moisture damage to walls or floors; electrical hazards. | Keep the steam plate moving to avoid oversaturating one spot. |
| Chemical Strippers | The most difficult-to-remove papers and adhesives when other methods fail. | Hard | Fumes and skin irritation; damage to surfaces if not cleaned properly. | Always test on a small, hidden area first and ensure maximum ventilation. |
Choosing the right approach from these four options is the first step toward a successful project. Once you know your plan of attack, you can gather your tools and get started with confidence.
Your Guide to the Wallpaper Removal Process
Okay, your assessment is done and you’ve got a game plan. Now it’s time to roll up your sleeves and get to work. This is where the real action begins. We’ll walk through the entire hands-on process, from room prep and safety to the specific techniques you'll need, packed with tips we've learned from countless projects right here in Connecticut.
Before a single strip of paper comes off, proper room prep is non-negotiable. This is what separates a clean, efficient job from a chaotic mess that puts your home at risk. Think of it as setting up a safe and effective work zone.
Setting the Stage for Success
Your main goal here is to protect everything you don’t want to get wet, sticky, or covered in debris. Trust me, wallpaper removal—especially with wet methods—can get surprisingly messy.
Start by clearing the room of as much furniture as you can. For those large, heavy pieces that have to stay, shove them into the center of the room and cover them completely with plastic sheeting.
Next, turn your attention to the floors. Lay down heavy-duty plastic sheeting and tape it securely to the baseboards. You're trying to create a "bowl" effect to contain water and peeled paper. For extra peace of mind, especially with hardwood floors, I recommend putting down absorbent rosin paper or old towels first, then covering them with the plastic.
Safety First: Before you do anything with water or metal tools, shut off the power to the room at the circuit breaker. Double-check with a non-contact voltage tester to be absolutely sure the power is off. Then, carefully remove all the electrical faceplates from outlets and light switches and cover the openings with painter's tape to keep water out.
Mastering the Dry-Stripping Technique
If you got lucky and discovered you have modern, strippable wallpaper, your job is about to get a whole lot easier. The key to a clean dry-strip is finding the right angle and using patient, steady force.
- Find a Starting Point: Look for a loose seam or corner. If you can’t spot one, use a putty knife to gently work an edge up. Be careful not to dig into the drywall underneath.
- Pull at an Angle: Grab the edge of the paper with both hands and start pulling it away from the wall. Don't just yank it straight out. Instead, pull down and away at a shallow angle—think about 45 degrees. This helps the paper release from the adhesive without taking the top layer of your drywall with it.
- Maintain Steady Pressure: Use slow, consistent pressure. Pulling too fast is a surefire way to tear the paper. If a section does rip, just find a new edge and keep going.
With a little luck, you can often pull off entire sheets at once. It’s a quick and incredibly satisfying process when it works.
This simple decision tree can help you visualize which path to take.
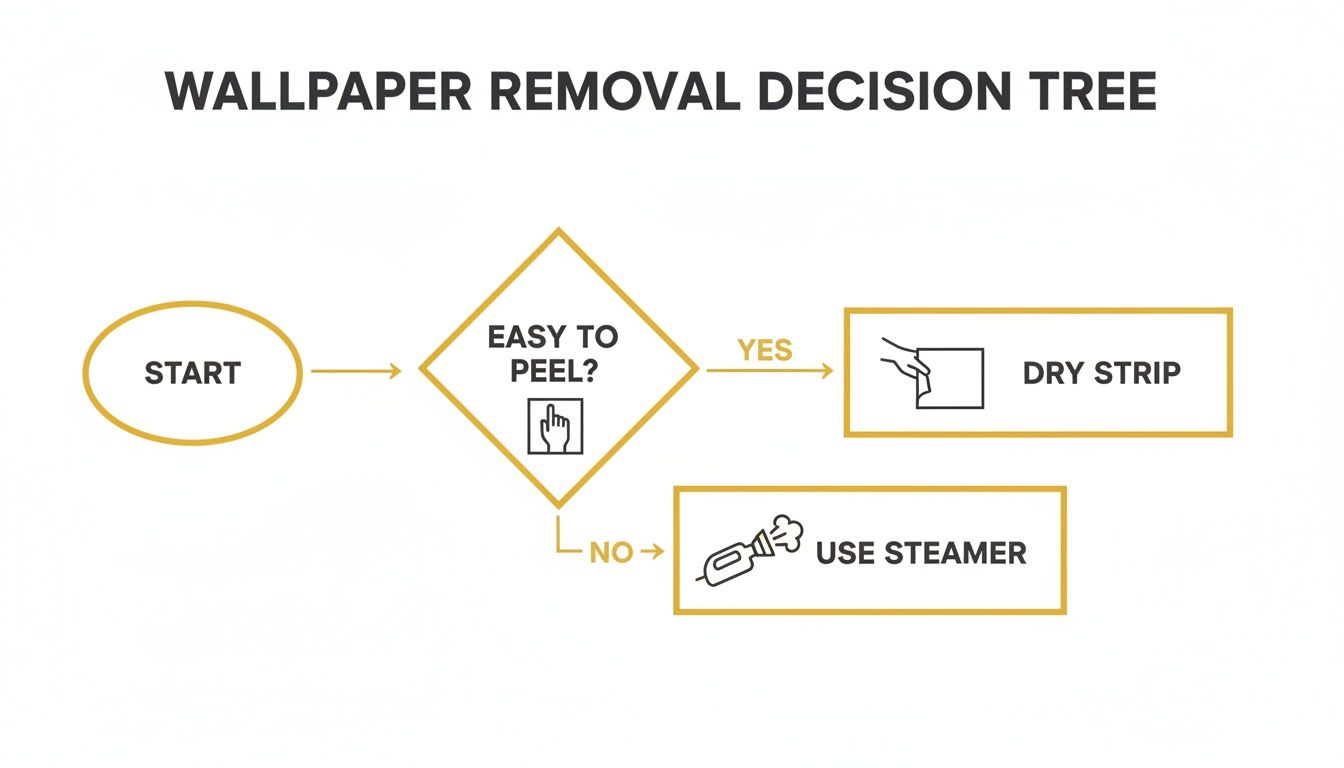
The flowchart makes the initial choice clear: if that paper peels easily, you’re good to go with a dry strip. If it puts up a fight, a wet method like steaming is your next move.
Executing the Score and Soak Method
For older, traditional papers, moisture is your best friend. The entire goal is to get water or a removal solution to penetrate the paper's surface and dissolve that ancient paste underneath.
First, you have to perforate the wallpaper. Grab a wallpaper scoring tool and run it over the entire wall with light to medium pressure. The tool’s little wheels create thousands of tiny holes, giving your solution a path to the adhesive.
Next, mix your soaking solution. A simple blend of hot water and a few drops of dish soap works surprisingly often. For more stubborn jobs, a commercial wallpaper remover concentrate mixed with water will give you more power.
We find a garden sprayer gives the most even and efficient application. Work in manageable sections, maybe 4×4 feet at a time. Thoroughly saturate the scored paper, but don’t let it get so wet that water is streaming down the walls. Let the solution soak in for about 15 minutes. You'll know it's working when the paper starts to look bubbled or feels soft.
Now it's time to scrape. Use a wide wallpaper scraper or a flexible putty knife. Hold the tool at a low angle (around 30 degrees) and gently push under the softened paper to lift it. Let the tool do the work and resist the temptation to gouge the wall.
Harnessing the Power of a Steamer
When you’re up against multiple layers of paper or truly stubborn, old adhesive, a wallpaper steamer is a game-changer. This tool uses hot steam to quickly melt the paste, making removal much, much easier.
Fill the steamer with water and let it heat up. Once it’s chugging out steam, hold the steam plate flat against a section of wall for about 30 seconds. The steam will penetrate the paper and liquefy the adhesive.
Move the steamer, then use your scraper to lift the paper. It should come off in large, pliable sheets. The best workflow is to work from top to bottom, steaming a new section while you scrape the one you just steamed. Keep a bucket close by for all the wet, sticky strips.
- Tip for Refills: Keep a large watering can full of water nearby. It makes refilling the steamer's tank quick and easy, minimizing your downtime.
- Be Patient: If a piece is being stubborn, just give it another blast of steam. Don't try to force it with the scraper—that's how you damage the wall.
No matter which method you use, once all the paper is off, you'll almost certainly have leftover adhesive on the walls. This glue must be completely removed before you even think about priming and painting. A final wash-down with warm water and a sponge, or a dedicated adhesive remover, is a critical final step in the removal process.
Repairing and Prepping Walls for a Perfect Finish
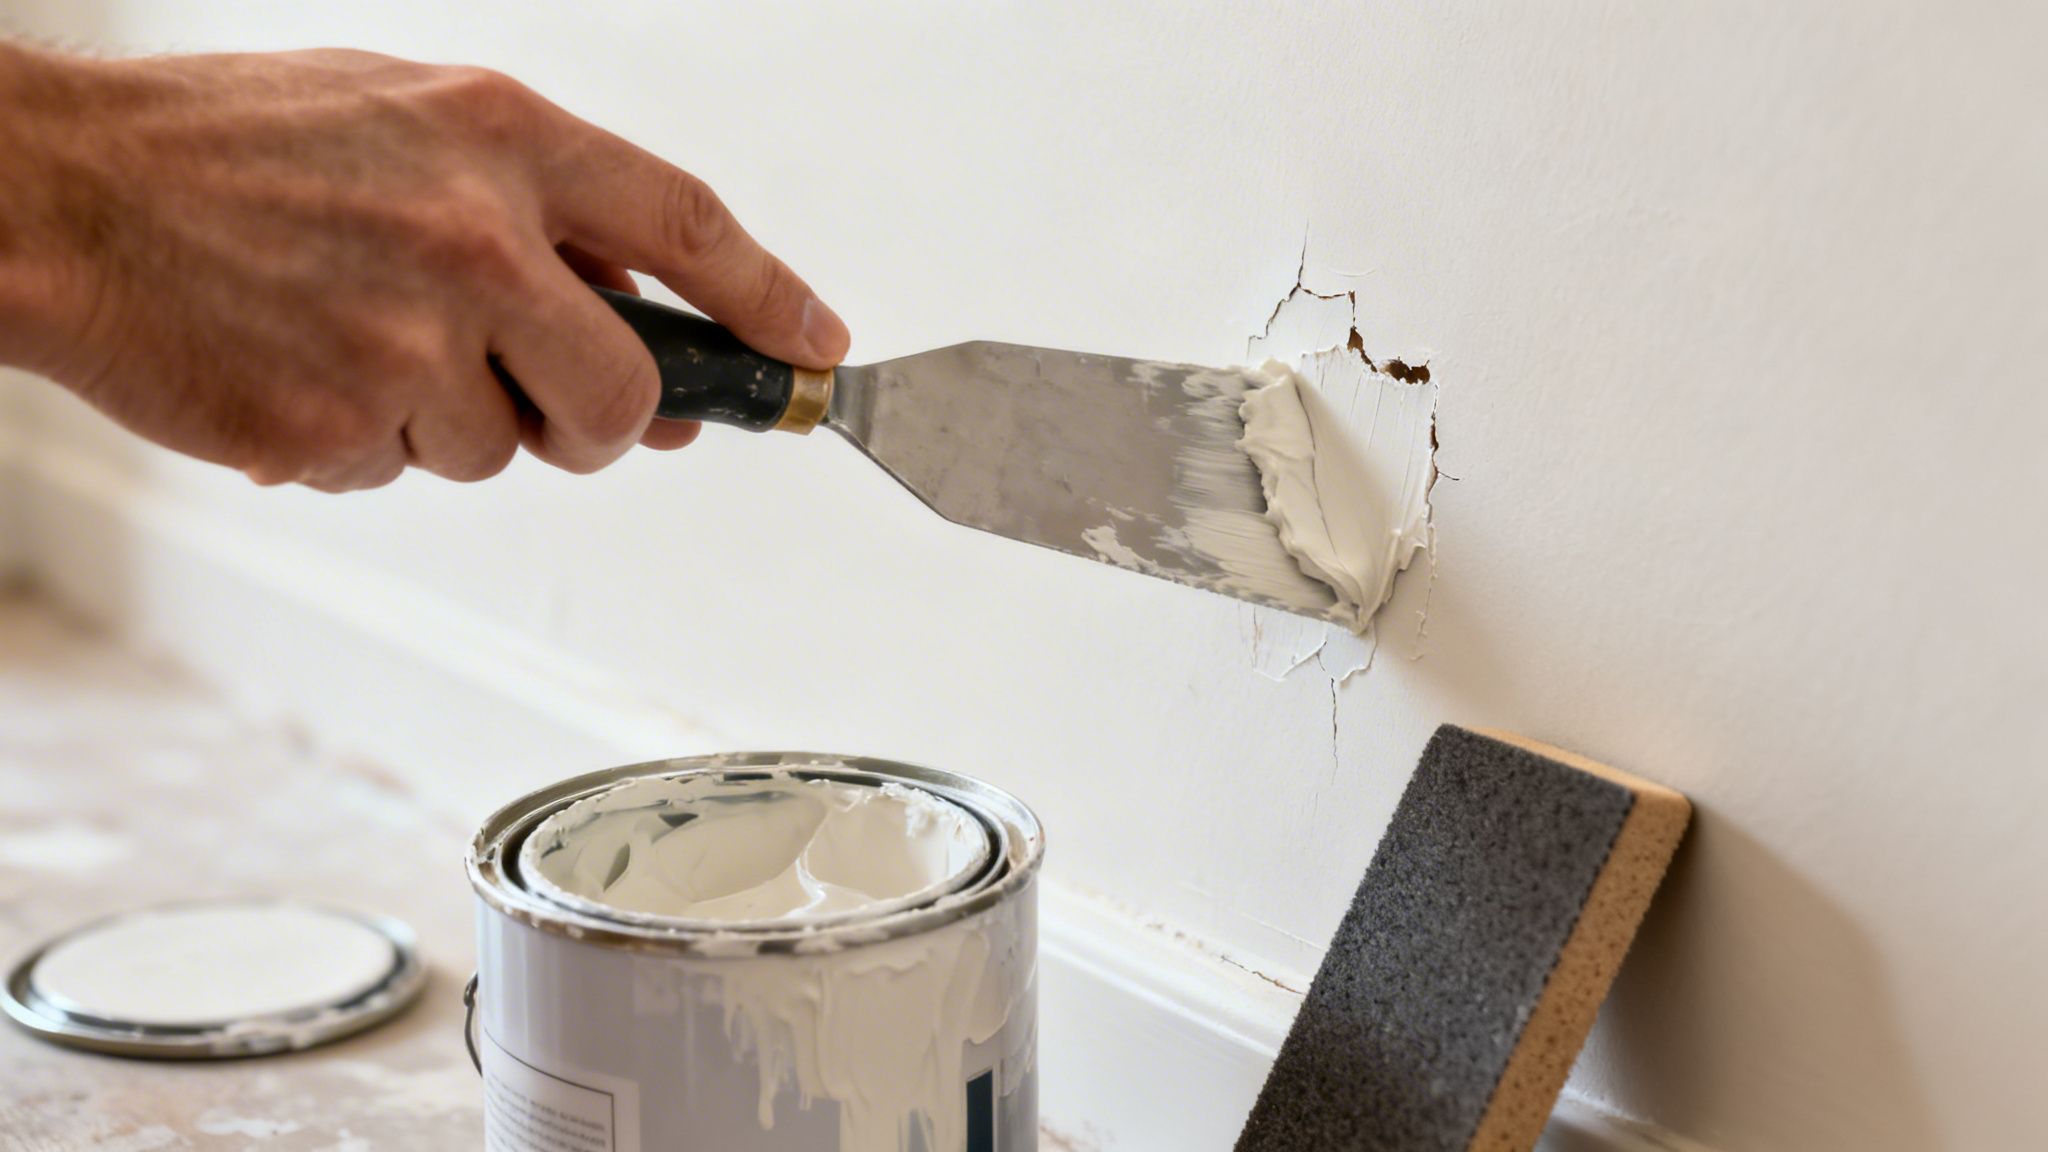
Getting all the wallpaper off the wall feels like you've crossed the finish line. But in reality, you're only halfway there. The real secret to a professional-looking paint job isn't the paint—it's the meticulous prep work you do right now. This is where you turn a battle-scarred wall into a flawless canvas.
Ignoring these next few steps is the most common DIY mistake we see. Every bit of leftover adhesive, every tiny gouge, and every spot of torn drywall paper will telegraph right through your new paint. Taking the time to properly repair and prime your walls is what separates an amateur job from a truly professional finish.
Conquering the Leftover Adhesive
Even with the most careful removal, a sticky, tacky film of old wallpaper glue will probably be left behind. You might not see it, but you'll feel it. This residue is water-soluble, and if you paint over it, the moisture in the paint reactivates the glue. The result? A crackled, peeling, or blotchy mess.
The best way to get rid of it is with a simple solution of warm water and a little dish soap. A dedicated wallpaper adhesive remover also works well.
- Get a bucket of warm, slightly soapy water and a large sponge.
- Work from the top of the wall down, scrubbing in manageable sections.
- Have a second bucket of clean water handy to rinse your sponge frequently. This keeps you from just spreading the sticky residue around.
You’ll know the wall is clean when it’s no longer tacky to the touch once it dries. For any stubborn spots, a nylon scouring pad can give you some extra grit, but be gentle—you don't want to scratch up the drywall.
Repairing Wall Damage Like a Pro
With the walls clean, it's time for a damage assessment. Run your hand over the entire surface to feel for imperfections. A great pro tip is to hold a utility light at a low angle against the wall; this casts long shadows and reveals every tiny ding, gouge, and tear you might otherwise miss.
Most damage from removing wallpaper falls into two camps: shallow gouges and torn drywall paper. For small dings, old nail holes, and light scratches, a lightweight spackling compound is perfect. Just use a flexible putty knife to apply a small amount, slightly overfilling the spot.
For bigger gouges, deeper cracks, or areas where the drywall's face paper has torn away, you'll need a more robust joint compound, often called drywall mud.
When the face paper of the drywall tears, it exposes the fuzzy, brown gypsum core. Never apply joint compound directly to this fuzzy surface. It will absorb moisture from the mud and bubble up, creating an even bigger problem. You have to seal it first with an oil-based or shellac-based primer before you patch.
Once the primer over any torn paper is dry, apply a thin coat of joint compound with a 6-inch taping knife. Feather the edges out to blend seamlessly with the wall around it. Let it dry completely, which can take up to 24 hours. For a truly professional finish, you can learn more about the different types of joint compounds and their uses by exploring resources like this one on CP Painting's professional techniques.
The Art of a Glass-Smooth Surface
After all your patches have fully cured, it's time to sand. The goal is to make every repair perfectly flush with the rest of the wall, creating one uniform surface. For small spackle patches, a fine-grit sanding sponge (120-grit or higher) is all you need.
For larger areas you've patched with joint compound, a pole sander will make the job much faster and help you achieve a flat, even finish. Use a light touch and let the sandpaper do the work. After sanding, the wall will be covered in fine dust. You must remove this before priming. Just wipe the entire wall down with a damp cloth or a tack cloth.
Priming: The Non-Negotiable Final Step
You’ve cleaned, patched, and sanded. It's so tempting to grab a roller and start painting, but priming is the one step you absolutely cannot skip. A quality primer does three critical jobs:
- Seals the Surface: It creates a uniform, non-porous base, so your topcoat of paint absorbs evenly for a consistent sheen. Fresh joint compound is extremely porous and will "flash" (look dull and blotchy) if it isn't primed.
- Blocks Stains: Primer will lock in any lingering adhesive residue or old water stains, preventing them from bleeding through your beautiful new paint color.
- Ensures Adhesion: It gives the new paint a perfect surface to grip onto, guaranteeing a durable, long-lasting finish that won't peel or chip.
For walls that have just had wallpaper removed, an oil-based or shellac-based primer is your best bet. These are "problem-surface" sealers, and they are superior at locking down any remaining glue and preventing future issues. Once that primer is on, your walls are finally ready for the fresh new color you've been waiting for.
Common Problems and When to Call a Professional
Even a project that seems straightforward can hit a wall—sometimes literally. You can follow every step to the letter and still find yourself wrestling with paper that just won’t budge. Knowing what to expect can help you troubleshoot, but it’s just as important to recognize when a DIY job is about to become a major headache.
Some issues are just part of the territory. For instance, discovering a second (or third!) layer of wallpaper is a classic surprise in older homes. It's not a deal-breaker, but it does mean more work. You'll simply need to repeat the removal process for each layer. A steamer is your best friend here, as it's great for penetrating those deep-seated layers of old paste.
Another common frustration is leftover adhesive that refuses to wash away. If your soap-and-water mix isn't cutting it, don't keep scrubbing—you'll risk damaging the wall. Instead, switch to a dedicated adhesive remover designed to break down that stubborn, glue-like residue.
Warning Signs You Need a Pro
Not every problem has an easy DIY fix. Some situations can go from bad to worse in a hurry, leading to serious wall damage if you push too hard. Spotting these red flags is the key to preventing a small annoyance from turning into a big, expensive repair job.
Here are the signs that it’s time to put down the scraper and call for backup:
The Wallpaper Comes Off in Tiny, Confetti-Like Shreds: If the paper refuses to peel and just flakes off in tiny pieces, even after proper soaking or steaming, stop. This is a tell-tale sign the wall wasn't primed correctly before the paper went up. The wallpaper adhesive has likely fused with the drywall's paper face, and trying to force it off will almost certainly rip your drywall to shreds.
You Uncover Significant Wall Damage: Peeling back the paper might reveal more than you bargained for. Watch for large cracks, crumbling plaster, soft or damp drywall, and any sign of mold. These aren't just cosmetic issues. A professional painting contractor knows how to handle mold remediation safely and can perform the structural repairs needed to make the wall sound again.
The Wall Is Made of Plaster: Older homes with traditional plaster walls require a very delicate touch. Plaster is brittle and can easily crack or crumble from too much moisture or aggressive scraping. Professionals have the experience and specific techniques to get wallpaper off these surfaces without causing damage.
When the effort to remove the wallpaper starts to damage the wall itself, you've hit a critical point. Forcing the issue will only rack up more time and money in repairs later. This is the moment to bring in a professional.
The Value of Professional Expertise
Hiring a team like CP Painting Company isn't just about avoiding a hassle; it’s about getting a flawless, durable finish. A pro crew comes equipped with commercial-grade tools, the experience to handle any wallpaper curveball, and the skills to perform perfect wall repairs.
A job that might take you an entire weekend, they can often knock out in a day. For a look at the pristine finish that expert preparation makes possible, you can see some of our completed local projects. This professional approach protects your home’s value, saves you from costly mistakes, and guarantees your walls are perfectly prepped for a beautiful new look.
Your Wallpaper Removal Questions, Answered
Even the most straightforward wallpaper removal project can throw a few curveballs. You're not the first person to get partway through and have a dozen new questions pop up. We hear them all the time from homeowners, so let's tackle the most common ones head-on.
How Long Does It Take to Remove Wallpaper From a Room?
This is the million-dollar question, and the honest answer is: it depends. The time it takes hinges entirely on the size of the room, what kind of paper you're dealing with, and the method you're using.
A small powder room with modern, strippable vinyl? You might knock that out in 2-4 hours. But an older, larger living room with paper-backed wallpaper that’s been up for decades could easily swallow your entire weekend. That's especially true if you discover multiple layers hiding underneath.
The real time-killers are stubborn glue and unexpected wall damage that needs patching. For a bit of perspective, our professional crew can typically strip, clean, and prep a standard 12×12 room in about 4-8 hours. We've got the specialized tools and the experience to work efficiently without causing damage.
Can I Just Paint Directly Over Wallpaper?
Technically, yes. Should you? Absolutely not. Painting over wallpaper is a shortcut that almost always ends in regret. The moisture from the new paint soaks into the paper's seams, causing them to lift, bubble, and peel right off the wall.
Painting over wallpaper is like building a house on a shaky foundation. The new paint may look fine for a short time, but underlying issues with the paper and adhesive will eventually cause bubbling, peeling, and a finish that you’ll regret not stripping in the first place.
And don't forget about texture. Any pattern or embossed design on the wallpaper will telegraph right through the new paint, leaving you with an uneven, unprofessional-looking finish. For a smooth, durable result that will last, proper removal is the only way to go.
What Is the Most Common Mistake People Make?
Hands down, the single most damaging mistake we see is impatient, aggressive scraping. It’s easy to get frustrated and start trying to force the paper off with a scraper. When you use too much pressure or hold the blade at a steep angle, you're almost guaranteed to gouge or tear the drywall underneath.
This one mistake can turn a simple removal project into a major drywall repair job. Now you're spending a ton of extra time and money patching and sanding before you can even think about picking up a primer roller. A close second is not getting all the old glue off the wall—that's a surefire way to make your new paint crackle, blister, or fail to stick at all.
Is It Worth Hiring a Professional to Remove Wallpaper?
Hiring a pro is often a smart investment, especially for bigger jobs, older homes with delicate plaster walls, or wallpaper that just refuses to budge. A professional crew comes equipped with the right tools, like commercial-grade steamers, and the know-how to get the job done quickly without wrecking your walls.
We handle the entire messy process, take care of any necessary wall repairs, and prep the surface so it's perfectly smooth and ready for paint. Ultimately, it saves you from costly DIY mistakes, gives you your weekend back, and guarantees a high-quality result.
Ready to skip the frustration and ensure your walls are the perfect canvas for a fresh new look? The expert team at CP Painting Company has the experience and tools to handle any wallpaper removal job, big or small. Contact us today for a free, no-obligation estimate and let's get your project started right.
Crafted with Outrank app


