
Finding rot on your home’s exterior can be a gut-sinking moment, but restoring rotted wood is often far more doable—and less expensive—than most people think. For many common problems we see on the job, a professional repair with modern epoxy products can bring back the wood's strength and look, saving you from a full-blown replacement. This guide will help you figure out the right call for your home.
First Look at Wood Rot: Deciding Between Repair and Replacement
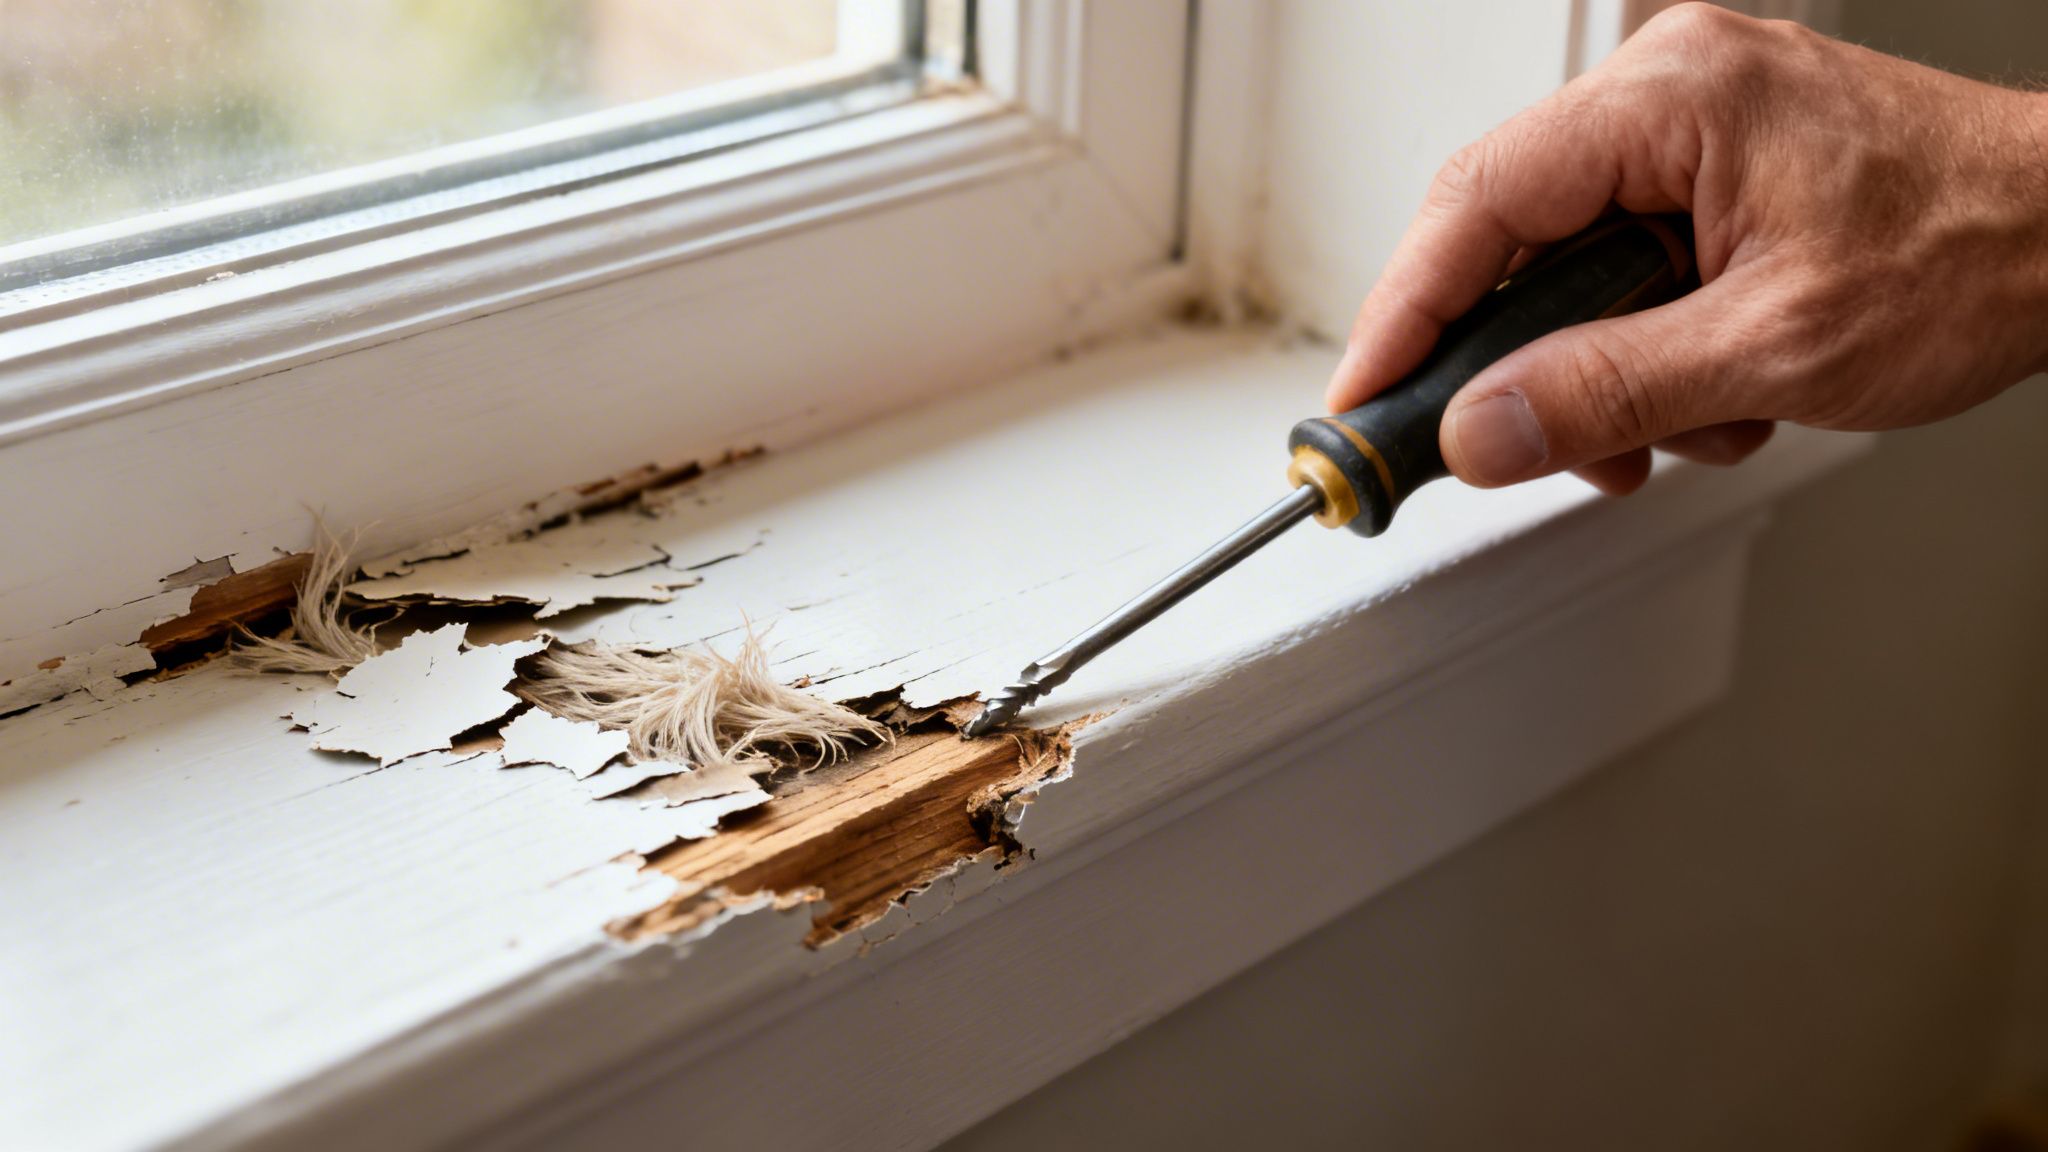
The second you poke at a window sill or door frame and find soft, crumbly wood, it’s easy to imagine massive repair bills. But before you start budgeting for a major construction project, take a breath. Not all wood rot is a death sentence for your trim.
The first, most crucial step is figuring out exactly how bad the damage is. Is it just a little surface-level decay, or has it eaten deep into the wood, compromising its structural integrity? Your answer determines everything.
Choosing to repair the wood is often the smarter financial decision, especially for cosmetic pieces or on historic homes where you want to keep the original details. A solid repair can save you 40% or more compared to a full replacement, which tacks on major labor costs for tear-out, installation, and finishing.
Gauging the Severity of the Rot
Your best tool for this job is surprisingly simple: a good old-fashioned screwdriver or an awl. Go to the spot that looks suspicious and gently start probing. You'll feel the difference right away. Healthy wood will be solid and fight back, while rotted wood feels soft, spongy, or just crumbles.
As you poke around, here’s what to look for:
- Surface-Level Rot: If your screwdriver only goes in about a quarter-inch before hitting solid wood, you're almost certainly looking at surface rot. This is the perfect candidate for an epoxy restoration.
- Deep or Widespread Rot: If the tool sinks in easily with almost no resistance, or the rot seems to cover more than 50% of the board's thickness, replacement becomes the safer, more practical route.
- Structural vs. Cosmetic Wood: This is a big one. A rotted porch joist or a support post is a serious structural issue that needs to be replaced, no questions asked. On the other hand, a decayed piece of decorative window trim is purely cosmetic—an ideal job for repair.
Pro Tip: Always check the horizontal surfaces where water loves to sit. We see it all the time on window sills, door thresholds, and the bottom edges of corner boards and fascia. These spots are ground zero for moisture getting in and causing rot.
Making the right call here sets you up for success. It keeps you from wasting money on a replacement you don't need, or worse, attempting a repair that’s just going to fail in a year or two.
To help you decide at a glance, we put together this quick guide.
Repair or Replace: A Quick Decision Guide for Rotted Wood
This table breaks down the key factors to help you make a quick, confident decision on whether to fix the wood you have or swap it out for new material.
| Assessment Factor | Repair If… | Replace If… |
|---|---|---|
| Rot Depth | The rot is shallow (less than 1/4" deep) and there's solid wood underneath. | The screwdriver sinks in deeply with little resistance. |
| Extent of Damage | The rotted area is localized and covers less than 50% of the wood's cross-section. | The rot is widespread, covering a large portion or the entire board. |
| Wood Type | It's a non-structural element like decorative trim, fascia, or a window sill. | It's a structural component like a joist, beam, or support post. |
| Home Style | The home is historic, and preserving original millwork is a priority. | The wood is a standard, easily replaceable size and shape. |
| Cost & Labor | You want to save up to 40% by avoiding full tear-out and installation. | The labor to meticulously repair the damage would cost more than replacement. |
After weighing these factors, you'll have a much clearer path forward. A well-done repair is just as durable as a replacement when done correctly.
This focus on smart restoration is a growing trend. The wood restorer industry, which covers the epoxies and consolidants we use for these repairs, was valued at USD 1.2 billion in 2024 and is expected to more than double by 2034. It makes sense, especially in damp climates like Connecticut and Westchester County, NY, where moisture is a constant battle. For example, we might estimate $5,000 to properly restore a rotted porch on a classic Fairfield County colonial, while a full replacement could easily climb past $15,000. You can see more details in this wood restorer market data.
Ultimately, the choice comes down to balancing the severity of the rot, the location, and the cost. Taking a few minutes to inspect it properly will help you make a smart decision that saves money and protects your home's character for years to come.
Assembling Your Toolkit for a Flawless Wood Restoration
Trying to fix wood rot without the right gear is a recipe for frustration. It's the single biggest factor that separates a quick patch that fails in a year from a professional-grade restoration that lasts a decade or more.
This isn't about grabbing a random tub of wood filler from the hardware store. Real, lasting rot repair relies on a specific system of products that are designed to work together. Think of it like a two-step medical procedure for wood: first, you stabilize the damaged area, then you reconstruct what was lost.
Essential Materials for Restoring Rotted Wood
The heart of any successful project for restoring rotted wood is using the right materials. The stars of the show here are two-part epoxy systems, which are a world away from your standard wood fillers. A basic filler is purely cosmetic, but an epoxy system rebuilds the wood’s structural strength from the inside out.
Your primary materials will include:
- Epoxy Consolidant (Wood Hardener): This is a thin, watery liquid epoxy that soaks deep into the spongy, porous fibers of rotted wood. As it cures, it re-hardens those fibers, creating a solid, stable base for the filler. Skipping this step is a common mistake that guarantees the repair will eventually fail.
- Two-Part Epoxy Filler: This is a thick, putty-like material you mix just before you use it. It's what you'll use to fill voids, rebuild rotted-out corners, and reshape damaged trim. Unlike fillers that shrink and crack over time, a quality epoxy bonds permanently and becomes just as strong, if not stronger, than the original wood.
When you're picking an epoxy, match it to the job. For a spongy, porous window sill, a liquid consolidant is your best friend. But if you need to rebuild the entire corner of a door frame that’s missing, you’ll need a thicker, sculptable epoxy paste filler to get the job done right.
Choosing the right epoxy for your repair job is crucial. You can see the kind of durable, seamless results these products deliver in our gallery of completed projects.
The Right Tools for the Job
With your materials sorted out, you'll need a handful of specific tools to get the repair done cleanly and efficiently. Most are common household tools, but a few specialized items will make a world of difference.
For Removal and Preparation:
| Tool | Purpose and Pro Tip |
|---|---|
| 5-in-1 Painter's Tool | Your workhorse for scraping away loose paint and gouging out the soft, crumbly sections of wood. |
| Oscillating Multi-Tool | The absolute best tool for making precise, clean cuts to remove larger rotten sections without damaging the surrounding healthy wood. |
| Shop Vacuum | You have to get the repair area perfectly clean. A shop vac is essential for removing all the dust and debris before you apply the consolidant. A clean surface is non-negotiable for a strong bond. |
| Drill with Small Bits | Use this to drill a series of small "feeder" holes into the wood. These channels help the liquid consolidant penetrate much deeper into the affected area, ensuring a solid base. |
For Application and Shaping:
Once you've cleared out all the decay and are ready to rebuild, you’ll switch to a different set of tools. Precision is what matters here.
- Disposable Brushes and Plastic Putty Knives: Don't ruin your good tools with epoxy. Use cheap chip brushes to apply the consolidant and flexible plastic putty knives to work with the filler. They're cheap and you can toss them when you're done.
- A Block of Scrap Wood or Cardboard: You'll need a clean, disposable surface for mixing the two-part epoxy filler. Never mix it directly on the wood you’re repairing.
- Sandpaper (80, 120, and 220-grit): You'll need a few different grits to shape the cured epoxy. Start with a coarse 80-grit to knock down any high spots quickly, then move to finer grits like 120 and 220 to get it perfectly smooth for primer.
Having these specific items ready before you start makes for a smooth workflow. It stops you from having to make a frantic run to the store mid-repair, which is a real problem when you're working with epoxies that cure quickly. In our experience, proper preparation is truly 90% of the job.
Your Hands-On Guide to Epoxy Wood Repair
Alright, you've done the detective work and gathered your supplies. Now for the fun part—the actual repair. This is where you get to take that crumbling, rotted wood and bring it back to life, making it stronger than it was before. We're going to go beyond the instructions on the box and share the techniques we use in the field for a repair that truly lasts.
The secret to a great result with restoring rotted wood isn't speed. It's patience. Taking your time on each step ensures the next one has a solid foundation to build on.
This simple diagram shows the core workflow for any epoxy repair. It’s a three-part process that always builds on itself.
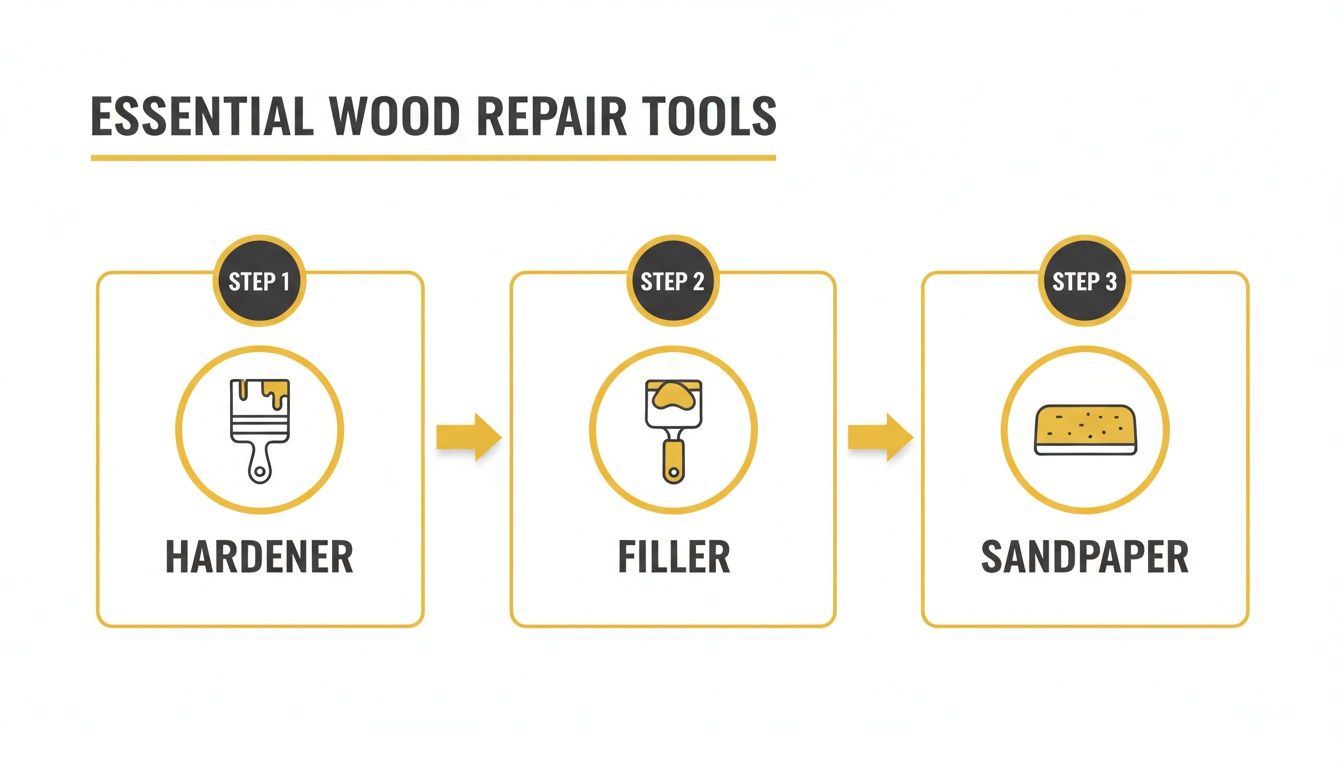
Think of it this way: a good hardener application makes the filler bond perfectly, and a smooth filler job makes the final sanding quick and easy.
Excavating the Rot
Your first hands-on task is to dig out every last bit of soft, punky wood. If you leave any rot behind, it will just keep decaying underneath your beautiful repair, causing it to fail down the road. You need to be a little aggressive and get back to clean, solid wood fibers.
A good 5-in-1 painter's tool is your best friend for scraping out the loose stuff. But for clean, precise cuts, nothing beats an oscillating multi-tool with a plunge-cut blade. It lets you perform surgical cuts right along the edge of the rot without damaging the healthy wood next to it.
Once the bulk of the rot is gone, switch to a wire brush and a shop vacuum. Get all the dust and debris out of there. The surface must be totally clean and—this is critical—absolutely dry for the epoxy to work its magic.
Field Tip: After clearing the rot, I like to drill a few small, angled holes (a 1/8-inch bit is perfect) into the wood around the edges of the repair zone. These little channels help the liquid hardener penetrate much deeper, creating an incredibly strong anchor for the filler.
Applying the Epoxy Consolidant
Now it’s time to stabilize what’s left. Epoxy consolidant, or wood hardener, is a thin, watery liquid that’s made to soak deep into the wood fibers you’ve just exposed. As it cures, it turns that slightly soft, porous wood into a rock-hard, solid base.
Grab a cheap chip brush and apply the consolidant generously over the entire area. You want the wood to look wet. Keep brushing it on in coats until the wood simply won't absorb any more liquid.
Follow the manufacturer’s instructions on cure times, as they can change with the temperature and humidity. Don't move on to the next step until the surface is fully cured and no longer feels tacky to the touch.
Selecting the right epoxy is just as important as the application. Different jobs call for different products, from thin, penetrating liquids to thick, sculptable putties.
Here’s a quick guide to help you choose the right product for your specific wood rot problem.
Epoxy Selection for Common Wood Rot Scenarios
| Repair Scenario | Recommended Epoxy Type | Key Characteristic | Pro Tip |
|---|---|---|---|
| Porous, Spongy Wood | Liquid Epoxy Consolidant | Very low viscosity; deep penetration | Apply until the wood stops absorbing it for maximum strength. |
| Minor Cracks & Checks | Low-Viscosity Structural Epoxy | Fills gaps without sagging; strong bond | Use a syringe for precise application into tight cracks. |
| Non-Structural Voids/Holes | General-Purpose Epoxy Filler | Thick, putty-like consistency; no-sag | Overfill slightly to allow for sanding down to a flush surface. |
| Rebuilding Missing Corners | Sculptable Epoxy Putty | Very thick; holds shape well | Use wax paper to help form sharp, clean corners and edges. |
| Major Structural Damage | Structural Epoxy Paste or Putty | High-strength; load-bearing capability | Combine with mechanical fasteners (screws) for maximum support. |
Matching the epoxy to the job ensures your repair will be strong, durable, and look seamless once painted.
Mixing and Applying the Epoxy Filler
With the wood hardened, you're ready to rebuild. Two-part epoxy fillers have a resin (Part A) and a hardener (Part B) that you must mix at the specified ratio—it's usually 1:1, but always double-check the label.
- Mixing Surface: A scrap piece of plywood or even a plastic container lid works perfectly as a disposable palette.
- Mixing Ratio: Eyeball equal scoops of Part A and Part B. For a really critical structural repair, using a small kitchen scale is a great way to guarantee a perfect ratio.
- Mixing Technique: Use a plastic putty knife to blend the two parts together until the color is completely uniform, with no streaks. This usually takes two to three minutes of thorough mixing.
Once mixed, the clock is ticking. You have a limited working time (usually 15-20 minutes) before the epoxy begins to harden. Only mix as much as you can apply in that window. Press the filler firmly into the void with your putty knife, making sure to push out any trapped air pockets.
Shaping and Finishing the Epoxy Repair
This is where craftsmanship comes in. Your goal is to shape the epoxy so it perfectly matches the profile of the surrounding wood.
Here's a pro tip: always overfill the repair area slightly. You want the epoxy to sit just a little bit proud of the wood surface. This gives you extra material to sand down, which is the only way to get a perfectly smooth, invisible transition.
For crisp corners on things like window sills or trim, use a piece of wax paper. Press it against the wet epoxy and use your putty knife to smooth the epoxy against the paper's edge. Once cured, the wax paper peels right off, leaving a perfectly sharp line.
After the epoxy has fully cured (give it at least 24 hours, but check your product’s instructions), it's time to sand.
- Rough Sanding: Start with coarse 80-grit sandpaper on a sanding block. This will knock down the excess filler quickly and get you close to the final shape.
- Fine Sanding: Move to a 120-grit sandpaper to smooth out the scratches from the rough sanding and really refine the contours.
- Final Smoothing: Finish with 220-grit sandpaper. This will give you an ultra-smooth surface that’s perfectly prepped for primer.
This detailed approach is why epoxy repairs have become so popular. The global wood repair epoxy market is now valued at around USD 410 million, largely because homeowners are choosing to restore rather than replace. In a home setting, a properly executed epoxy repair can add 20-30 years to the life of the wood, making all this careful prep work a fantastic investment. You can read more about these trends in this global market research report.
Once sanded and wiped clean, your repair is now a permanent, waterproof part of the wood. It won't shrink or crack, making it the ideal base for a paint job that will last for years.
Priming and Painting for Long-Lasting Protection
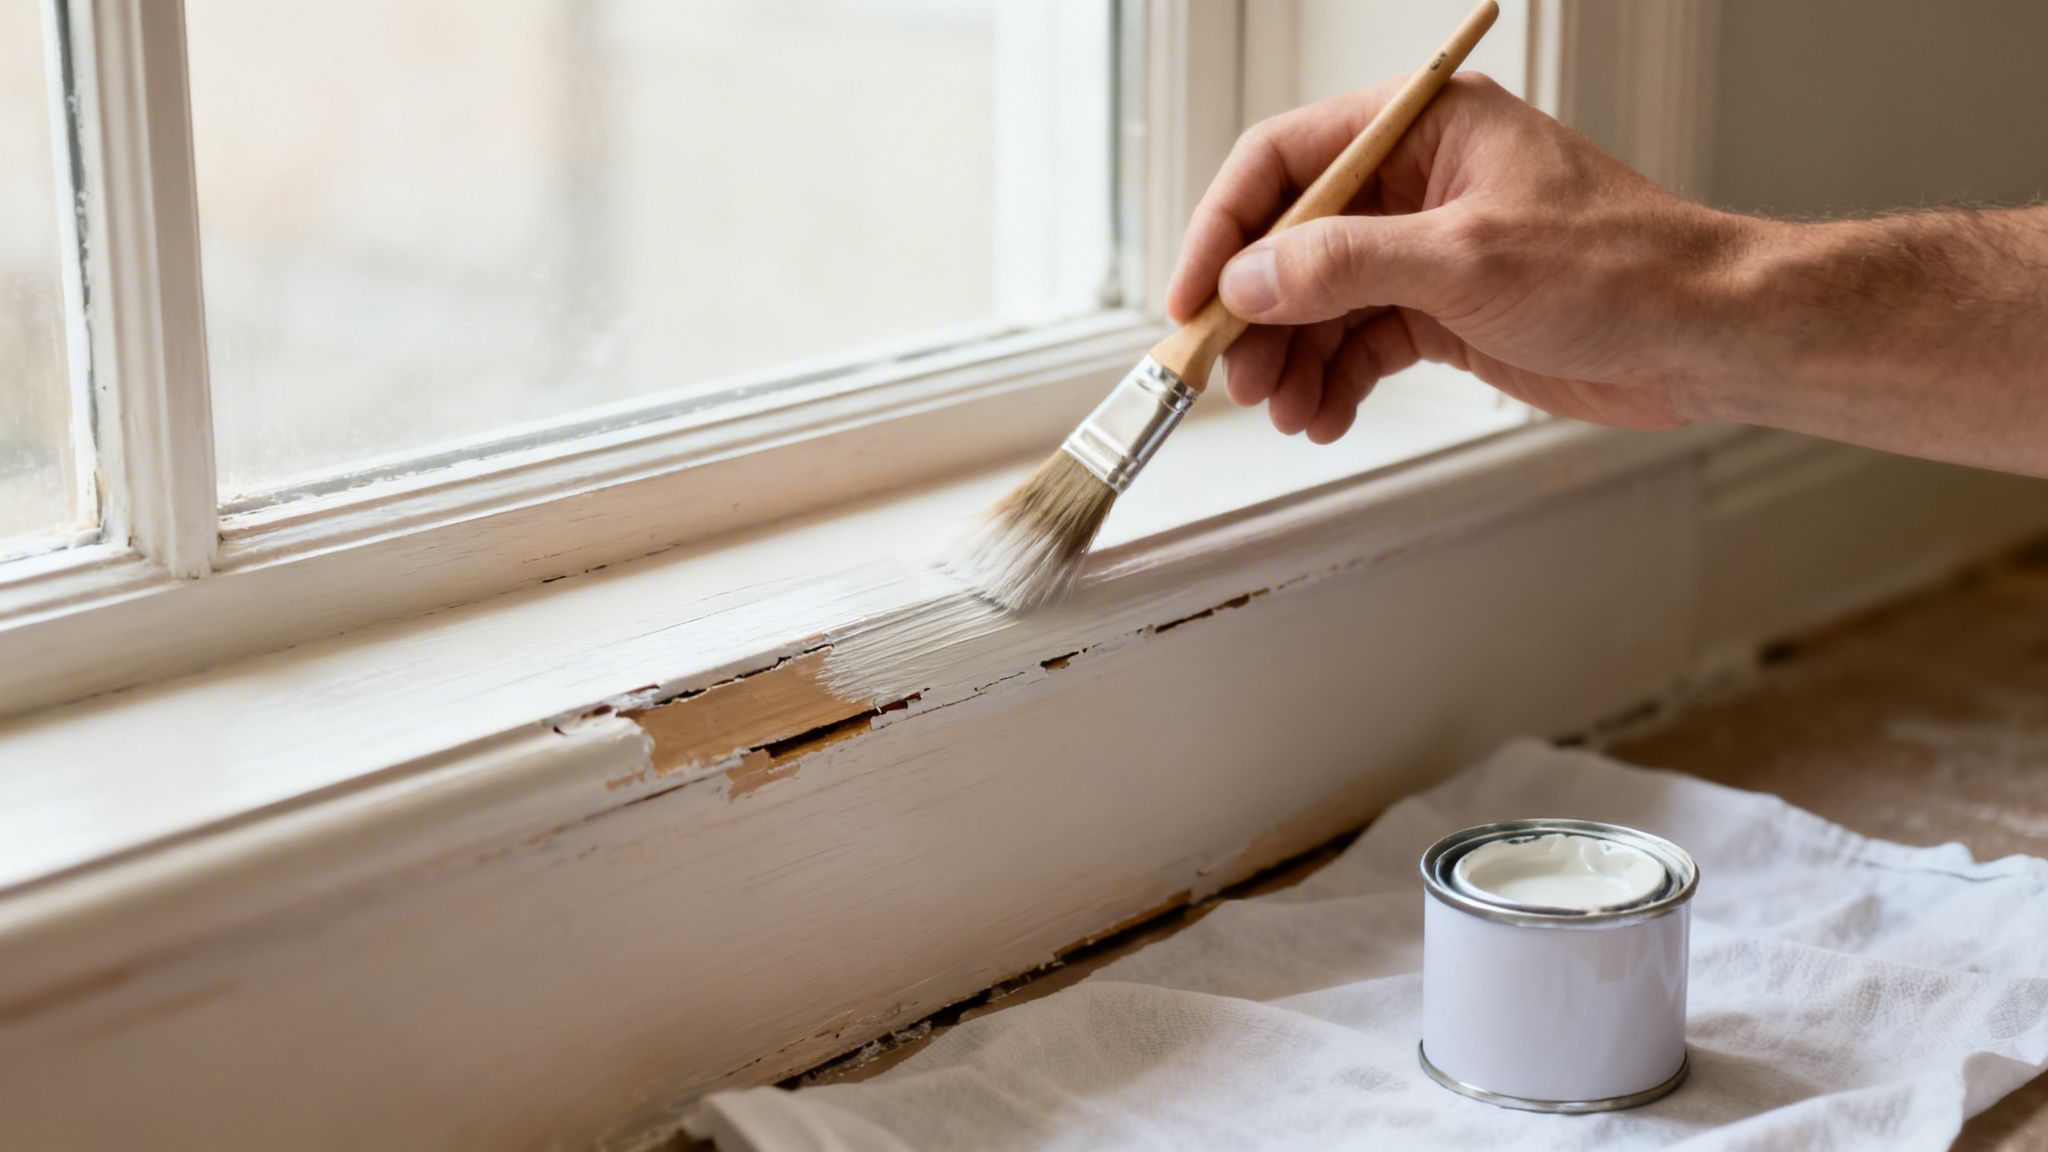
You’ve done the hard work of restoring the rotted wood. The damaged section is now solid, smooth, and shaped perfectly. It’s tempting to grab your final paint color and call it a day, but don't rush. This last stage—priming and painting—is what guarantees your repair will actually last for years to come.
This isn't just about looks. A proper finish is your repair’s only defense against the moisture and UV rays that caused the rot in the first place. An expert-level epoxy repair deserves an equally expert finish.
Why Priming Is Not Optional
Epoxy fillers are fantastic materials, but they cure into a non-porous, almost glass-like surface. Standard paint simply can’t get a good grip on something that slick, which is why you see peeling and chipping down the road. A high-quality primer is the essential middleman, bonding aggressively to the epoxy and creating the perfect surface for your topcoat to grab onto.
Think of it this way: painting directly over cured epoxy is like trying to write on glass with a ballpoint pen. Primer essentially frosts that glass, giving the paint something to adhere to.
The right primer does two critical jobs: it gives the topcoat something to stick to and it seals the repair, blocking any stains from old wood tannins from bleeding through your beautiful new paint.
This final sealing step is a key part of any professional restoration. In the property restoration field, it’s well-known that a proper epoxy and paint application can increase property value. According to some restoration industry benchmarks and their impact, professionally restored wood can withstand 50% more environmental stress. This is huge for historic homes in Connecticut, where so many pre-1950s houses need wood repairs that meet modern durability standards.
Choosing the Right Primer for Epoxy
Not just any can of primer will do the job here. When you're sealing epoxy and trying to block tannin bleed from the surrounding wood, you have two top-tier options.
- Oil-Based Primers: These have long been the go-to for exterior woodwork. They offer incredible adhesion to tricky surfaces like epoxy, do a great job of penetrating and sealing wood grain, and create a tough, protective film.
- Shellac-Based Primers: Famous for their stain-blocking power, shellac-based primers are your best bet for making sure no wood tannins or old water stains ever ruin your final paint job. They also dry fast and stick to almost anything.
For most exterior wood rot repairs we handle, a high-quality oil-based exterior wood primer is the best all-around choice.
Professional Techniques for a Seamless Finish
The goal here is to make the repair totally invisible. That takes a little finesse when you're priming and painting, and the key technique is called feathering.
- Prime the Repair First: Use a brush to apply a thin, even coat of your chosen primer directly over the sanded epoxy patch.
- Feather the Edges: Right away, while the primer is still wet, use a mostly dry brush to lightly sweep the primer outward from the patch onto the surrounding wood. This creates a soft, gradual transition instead of a hard edge you can see and feel.
- Apply the Topcoat: Once the primer is fully cured, apply your first coat of high-quality exterior paint. Start by painting the repaired area, then feather the edges out just as you did with the primer.
- Final Coat: Apply a second, final coat of paint over the entire board or trim piece. This unifies the whole surface, hiding the transition completely and making the repair disappear.
Using a premium exterior paint is non-negotiable, especially in the tough climates we see in Connecticut and New York where moisture and temperature swings are constant battles. Our team has years of experience with products that stand up to these conditions. You can see the kind of durable results we deliver and learn more about how our professional services ensure a lasting finish. By investing in the right materials and techniques, you’re ensuring all your hard work stays protected and looks great for years.
While we love seeing a homeowner tackle a DIY wood rot project—it's incredibly satisfying—knowing where to draw the line is just as crucial. A successful repair isn’t just about having the right epoxy; it's about being honest about the scale of the damage.
Knowing when to put down the tools and pick up the phone can be the smartest decision you make. It ensures the job is done right, keeping your home safe and structurally sound for the long haul. A little rot on a window sill is one thing, but some situations are clear signals to call in the experts.
When Rot Is Structural
This is the absolute, non-negotiable line in the sand. If the rot is cosmetic—say, on a piece of decorative trim or a fascia board—it's often a great DIY candidate. But when you find decay in any component holding your house up, the DIY option is officially off the table.
Think about parts of your home like:
- Support posts for a porch or deck
- Floor joists or ceiling joists
- Beams or headers carrying weight over windows and doors
- The sill plate where the house frame rests on the foundation
Fixing these isn't just a matter of digging out rot and filling the hole. It requires a deep understanding of load paths, how to properly support the structure during the repair, and often means replacing the timber entirely to meet building codes. A mistake here isn't just a cosmetic flaw; it can have catastrophic consequences.
The moment you discover significant rot in a load-bearing piece of wood, it’s time to call a professional. Experts have the engineering know-how and specialized equipment to replace these critical parts safely, ensuring your home remains stable and secure.
Dealing with Dangerous or Hard-to-Reach Areas
Your safety always comes first. A repair that seems straightforward on the ground becomes a whole different ballgame when it’s two or three stories up. Tackling rotted fascia boards or window trim high off the ground is a perfect example.
Juggling tools, epoxy resins, and sanders while perched on a tall extension ladder adds a serious level of risk. Professionals come equipped with the proper safety harnesses, scaffolding, and experience to work at heights without incident. If the project puts you in an awkward, unstable, or high-risk position, it's always smarter to hand it off to a team that does this work every day.
Historical Significance and Building Codes
Older homes, especially those with historical value, demand a much more delicate touch. If your house is a designated historic property or simply has beautiful, original millwork you want to preserve, a standard epoxy fill might not be the right move.
These situations often call for more advanced woodworking techniques, like a "dutchman" repair. This is where a new piece of wood is perfectly carved and fitted into the damaged section, preserving the original character of the woodwork.
Furthermore, any major repair has to meet local building codes. A professional contractor, like our team at CP Painting Company, stays current on all local requirements. We make sure any structural fix or significant replacement is fully compliant, so you don't run into trouble during a future home inspection or sale. You can see the meticulous standards we bring to every job in the project gallery from CP Painting Company.
Ultimately, the best decision comes from balancing your DIY ambition with a clear-eyed assessment of the job’s complexity and risks. When in doubt, a professional consultation is a small investment that can save you from major headaches and costly mistakes down the road.
Common Questions About Restoring Rotted Wood
When you’re staring down a rotted window sill or trim board, a few questions always pop up. It’s only natural. Before you start digging out soft wood or mixing up epoxy, you want to be sure you’re on the right track. We get these same questions from homeowners all the time, so let’s clear them up right now.
Getting these details right is the difference between a quick patch that fails in a year and a permanent repair that will last for decades.
Distinguishing Rot from Discoloration
One of the first challenges is figuring out if you're even dealing with rot. Is that dark spot on your trim just an old water stain, or is it active decay? While stains can be a warning sign, they aren't the final word. The best way to know for sure is what we call the "screwdriver test."
Take the tip of a screwdriver or an awl and gently press it into the wood. If it’s solid, you’ll feel firm resistance. If the wood is rotted, it will feel soft and spongy, or it might even crumble with very little pressure.
You can also look for a few other clues:
- Brown Rot: This is the most common type. It makes the wood shrink, turn dark, and crack into little cube-like pieces. We often call it "cubical rot."
- White Rot: This type bleaches the wood, giving it a whitish or stringy appearance. The wood will feel fibrous and soft, almost like string cheese.
If the wood is just stained but still feels hard as a rock, you’re probably fine to just clean, prime, and paint. If it's soft, it's time for a proper repair.
Can I Just Use Standard Wood Filler?
This is probably the most important question we get, and the answer is a hard no—at least not for true rot. Standard wood fillers are great for filling small nail holes or tiny cosmetic dings on healthy wood, but they are completely wrong for rot repair.
Think of it this way: a wood filler is like cosmetic makeup, meant to hide a small surface blemish. A two-part epoxy system is like a structural bone graft, designed to rebuild strength from the inside out.
Your typical hardware store wood filler has no structural integrity. It will shrink, crack, and eventually fall out, especially on exteriors where it’s exposed to moisture and big temperature swings. Epoxy, on the other hand, chemically bonds with the wood fibers to become a permanent, waterproof, and incredibly strong part of the board itself.
How Long Will an Epoxy Repair Last?
When you go through the effort of restoring rotted wood, you want to know you won't be doing it again next year. The good news is that a properly done epoxy repair is incredibly durable. It can easily last for decades—often outlasting the healthy wood around it.
The key phrase here is "properly done." That means you didn't cut any corners:
- Every last bit of soft, decayed wood was scraped out.
- A liquid epoxy consolidant was used to harden the remaining wood.
- The epoxy filler was mixed correctly and applied to a clean, dry surface.
- The repair was finished with a high-quality primer and at least two coats of paint.
When you follow these steps, the repaired area is sealed and becomes totally impervious to water. It won’t rot, shrink, or fail. It’s a permanent fix.
Best Weather for Applying Wood Epoxy
Finally, let's talk about timing. Epoxy cures through a chemical reaction, and that reaction is very sensitive to both temperature and moisture. You have to work in the right conditions.
Most epoxies perform best in a specific temperature range, usually between 50°F and 80°F (10°C to 27°C). If you work when it's too cold, the epoxy will take forever to harden and may never reach its full strength. If it's too hot, it can set up too fast, leaving you almost no time to work with it.
Even more critical than temperature is moisture. The wood you're repairing must be bone-dry, and you need to be working on a dry day with no rain in the forecast. Applying epoxy to damp wood is the #1 reason repairs fail. The epoxy can't bond to wet wood fibers, and you'll end up with a weak patch that eventually pulls away.
Knowing the answers to these questions will put you on the path to a great repair. However, if the rot seems extensive, is in a structural area like a deck post, or just feels like too much to handle, don't hesitate to call in a professional. The team at CP Painting Company has years of hands-on experience restoring rotted wood with precision, ensuring a seamless and permanent result for your home. You can learn more about our wood repair services by visiting https://www.cppaintintct.com.


